about shop contact sponosr home
Showing posts with label tutorial. Show all posts

Friday, December 30, 2011

Gift Bow Tutorial


Today I wanted to share a super easy tutorial on how to make your own gift bows. I love making these for presents because you can customize the colors to match your gift wrapping or just the person's personality! :D 


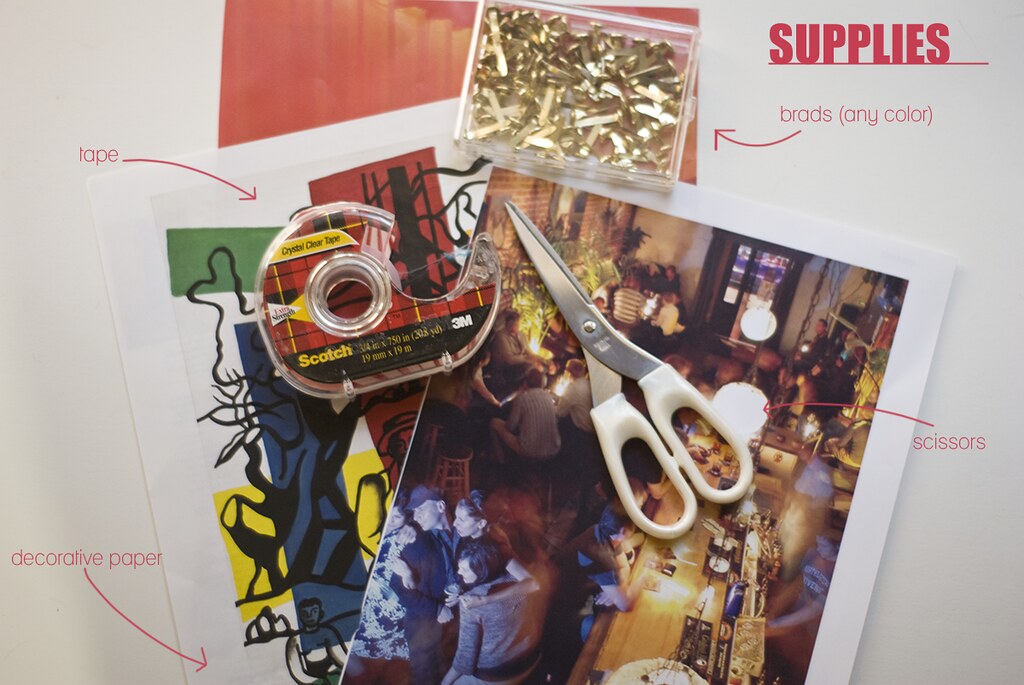
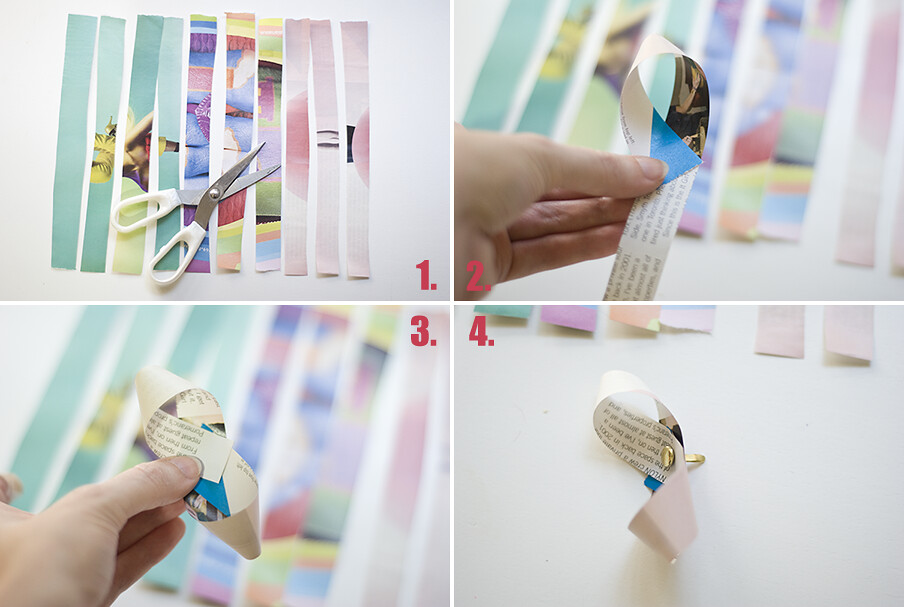
1. Cut out strips from paper of choice. I like to recycle magazine pages that have colors/prints I like. You don't have to be super exact when you cut them out--as you can see mine are far from perfect. Just remember-- the bigger and more strips you use, the bigger and fuller your bow will be!
2. Twist one side down and hold it halfway down the strip.
3. Repeat with other end.
4. Punch brad through middle, making sure you get both ends. You might want to make a hole with something sharp and then place the brad in--they tend to just bend when using them alone.


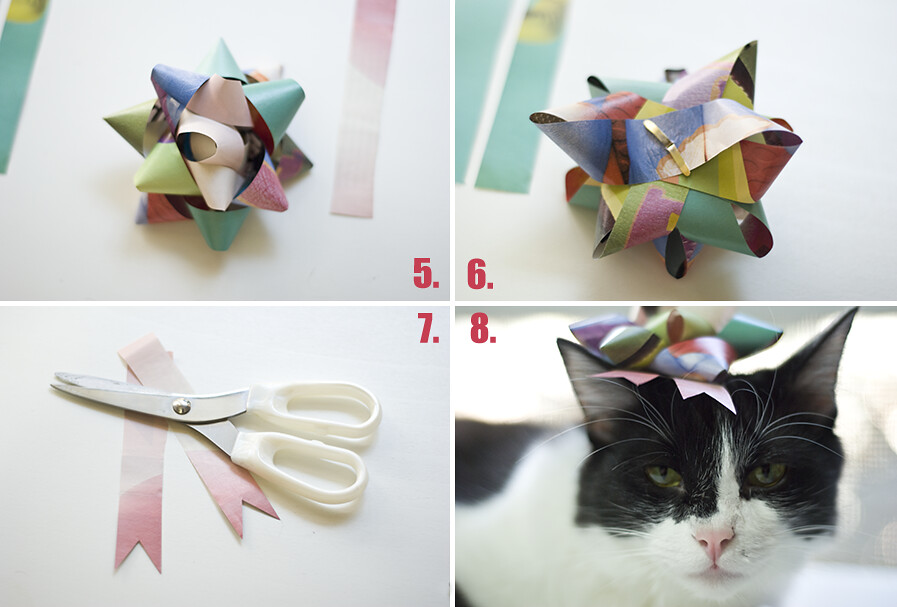
5. Keep repeating steps 2-4 until you have a bow you like.  Remember to place the pieces at different angles on the brad to get a bow shape.
6. Once you're done adding pieces close the brad to hold everything in place.
7. OPTIONAL: Cut some bottom ribbon pieces out of a spare strip and add to brad before closing.
8. Use tape to attach to your present...or your cat! [I actually didn't use any tape on my cat]

Hope you guys enjoyed my tutorial! :D  
Mary Rebecca

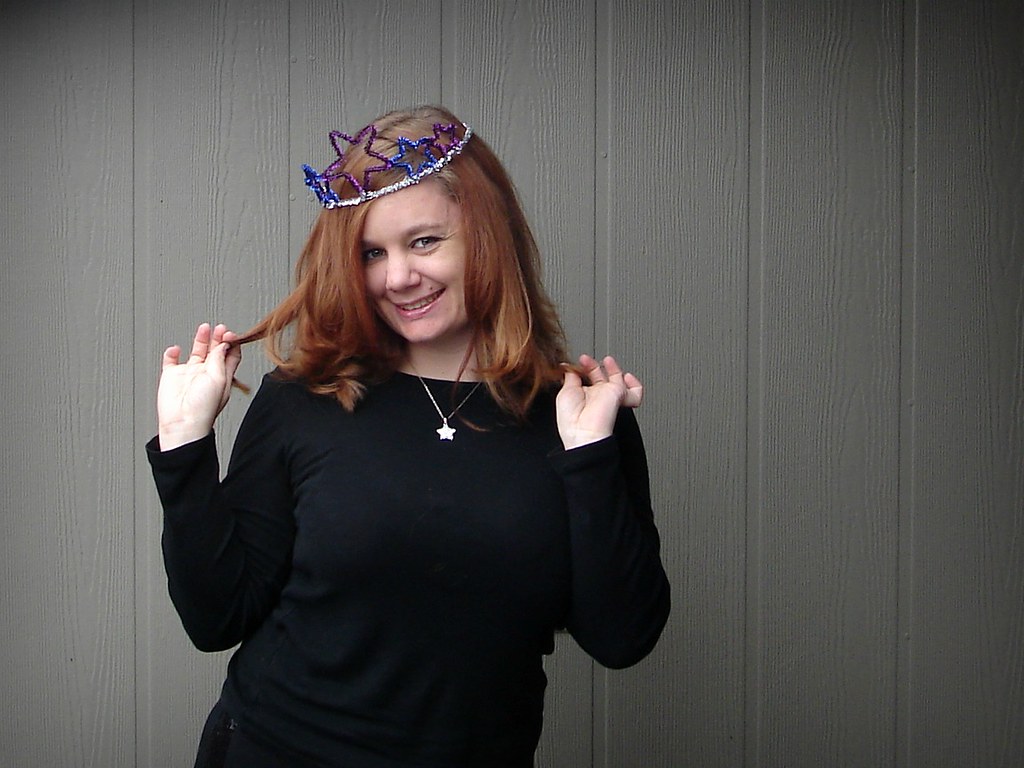
Birthday Party Crown Tutorial by Sparkles and Sticks


Hi everyone!  My name is Jaime, and I blog over at Sparkles and Sticks.  I am so excited to be a part of Mary Rebecca's Blog Birthday Party.  Have you wished her a Happy Birthday yet?

I was very inspired by the Birthday Party party Miss James threw for her daughter a few weeks ago- I immediately wanted to make a birthday crown of my own!  Instead, I decided to make one and give it to Mary Rebecca.  Virtually, obviously.

 
Supplies:
a pack of sparkly pipe cleaners in assorted colors.
strong scissors or wire clippers

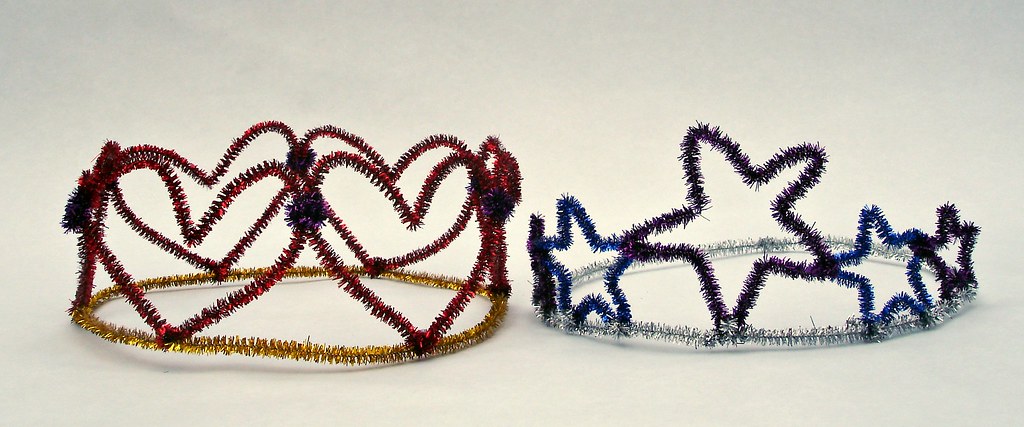
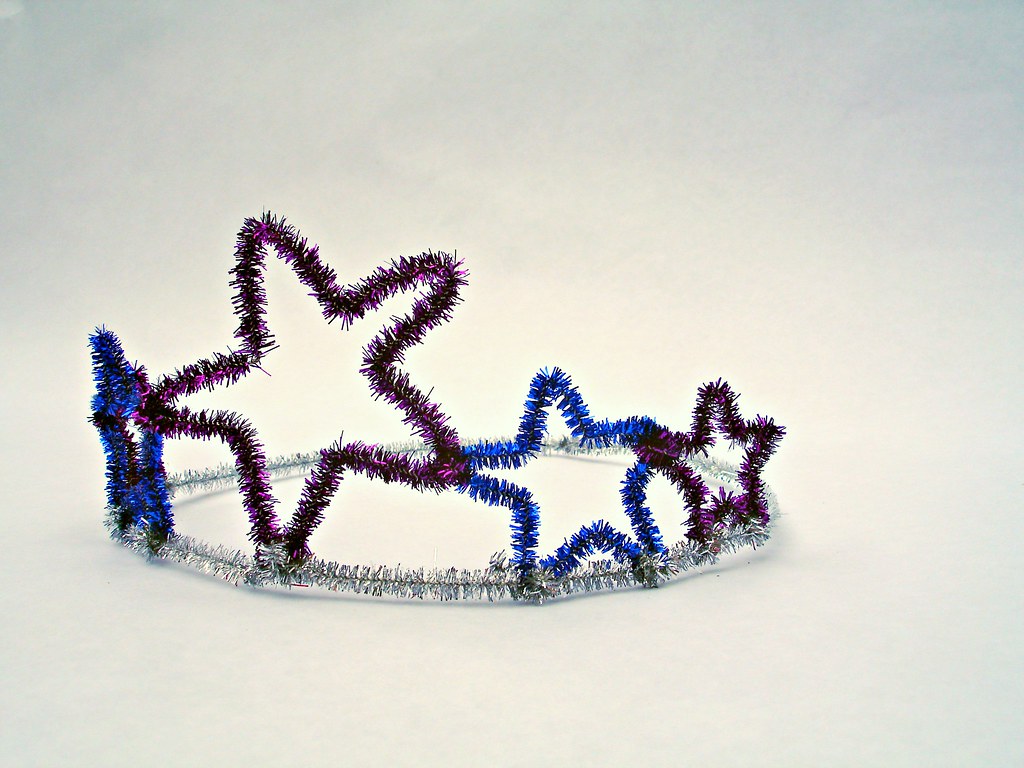
Star Crown


Step One: Attach two pipe cleaners together to form a circular base for your crown.

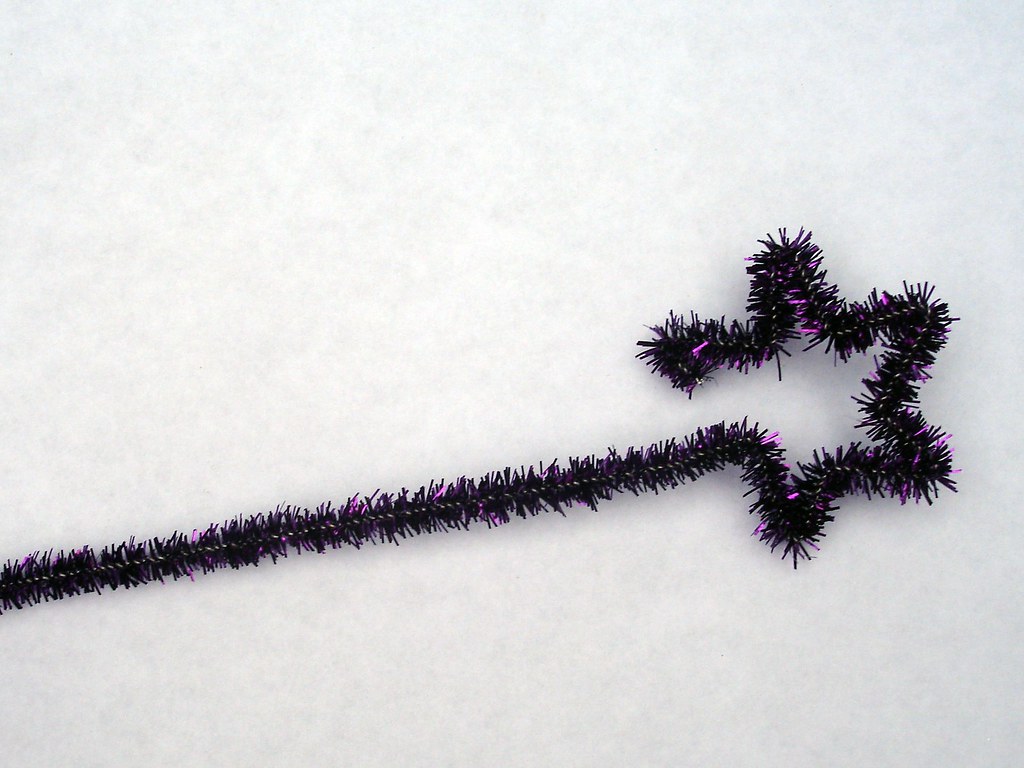
Step Two: Make your center star.  Start by making a very small crease at the end of your pipe cleaner.  You are going to use this "hook" to attach the two ends of the pipe cleaner.  Then, make ten crisp creases in your pipe cleaner.  The 10 segments you make with these creases form the perimeter of your star.  Manipulate the pipe cleaner until you are happy with the shape of your star.  Make another small hook at the end of your star.  Cut off any excess pipe cleaner and hook the two hooks together to complete your star.


Step Three:
 Make four more stars (two medium sized, two small) as described above).

Step 4:  Attach your stars together and to the base of your crown by twisting small pieces of pipe cleaner around the pieces you want to connect.


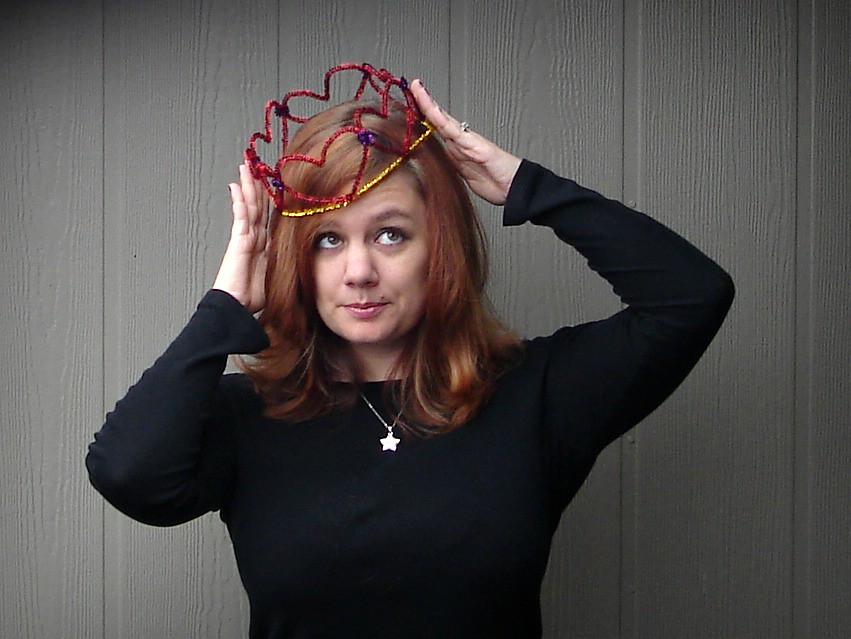
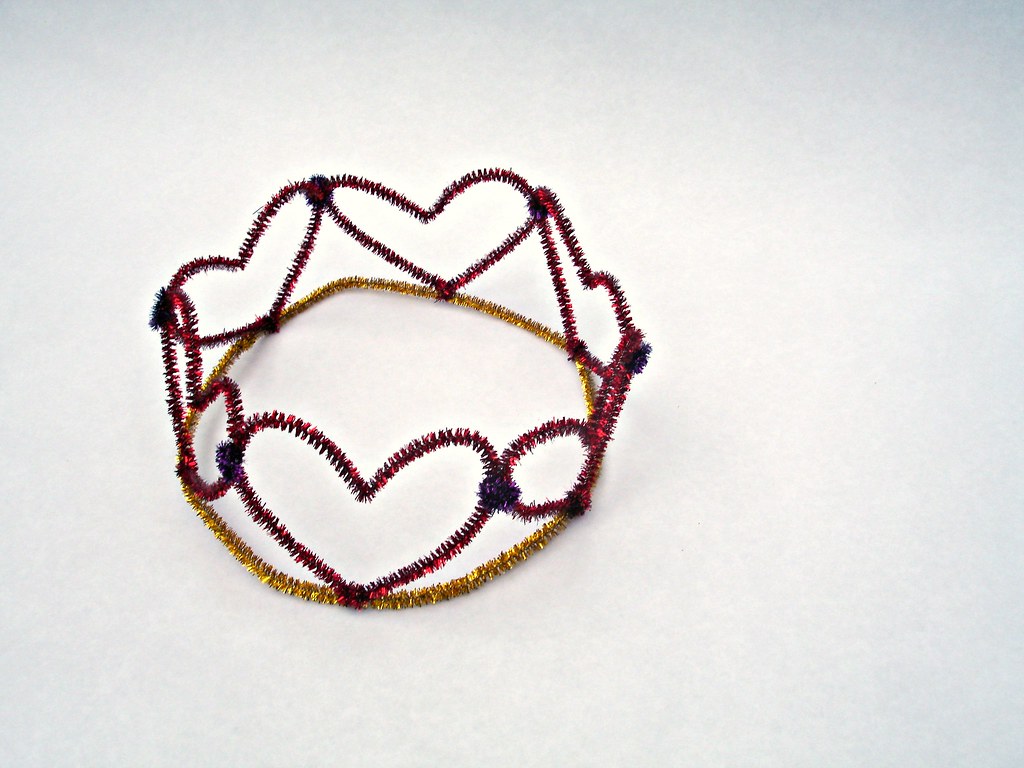
Heart Crown


Step One: Attach two pipe cleaners together to form a circular base for your crown.

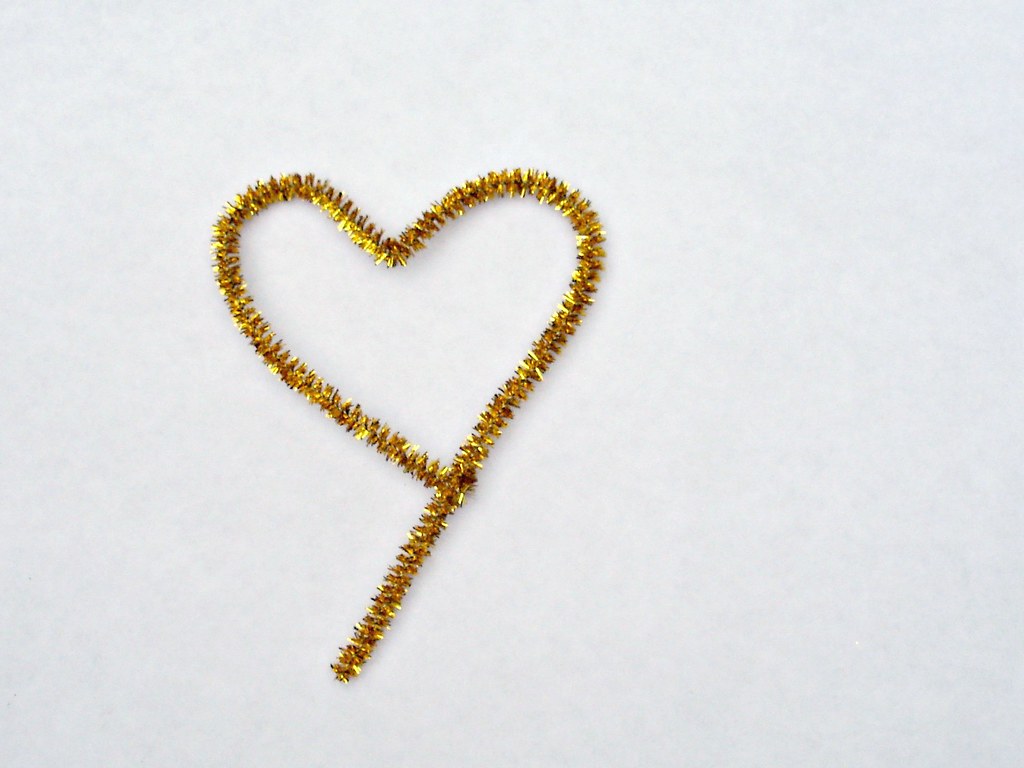
Step Two: Make your hearts.  Start by making a small crease at the start of your pipe cleaner- this bit will serve as a hook that will help complete your heart.  Bend the rest of your pipe cleaner into the shape of a heart.  Make sure the top humps a round and smooth while the center is a hard crease.  Make another hook at the end of your heart, trim excess pipe cleaner, and hook your heart together.  Make five more hearts, or however many you need to fill your crown.


Step Three:  Attach the bottom points of you hearts to the base of your crown by twisting small bits of pipe cleaner around both.  Make sure your hearts are evenly spaced.

Step Four:
 Attach the tops of your hearts together with small pieces of pipe cleaner.  Twist excess pipe cleaner into little circles for a pretty, royal effect.

  
Happy Birthday, Mary Rebecca!

xoxoxo 

Jaime

Friday, October 28, 2011

Zombie Makeup Tutorial Guest Post by Tera of Tera Sue

Hi! I'm Tera and I run a blog over at TeraSue.com
I have always loved horror movies. Especially zombie movies. Whether it's the original Dawn of the Dead or the remake, fast zombies, slow zombies, funny zombies (Shaun of the Dead), shark eating zombies (Zombie). You name it, I like it.

I don't think it's a surprise to anyone who knows me that my favorite month is October so when Mary offered up some of her blog space for October themed guest posts I jumped at the chance to share my DIY. So without further ado I present to you: How To Become a Zombie.


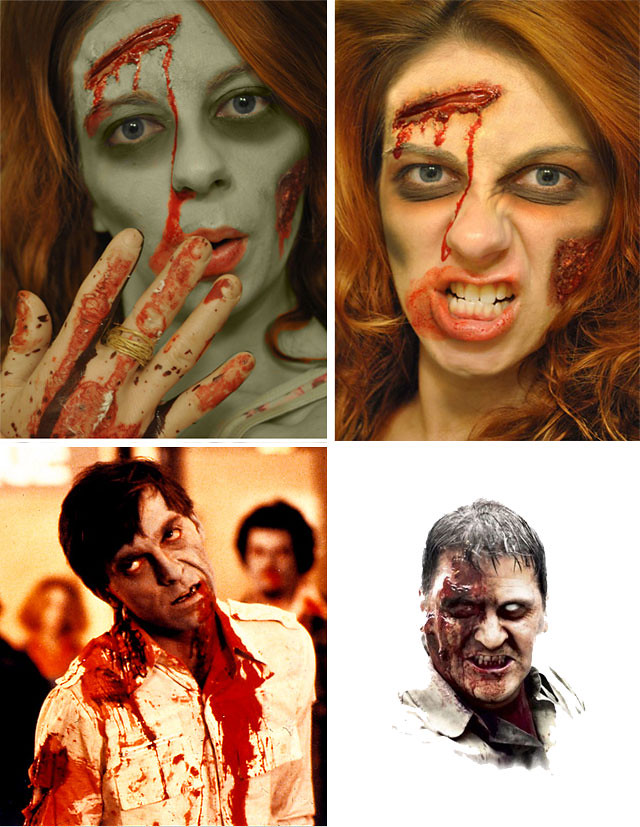
Because two of my favorite zombie movies are the Dawn of the Deads I decided to do a two parter. Whether you prefer the old school painted face zombie, or the new sexy flesh tone zombie it's easy to create these looks for your next zombie event.

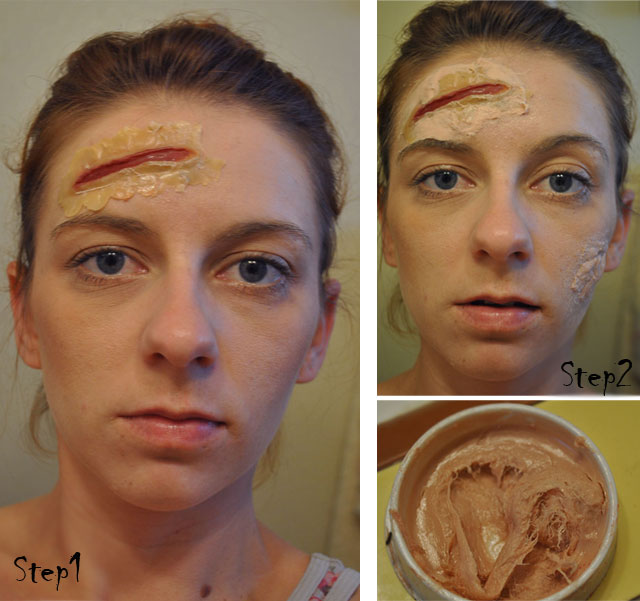
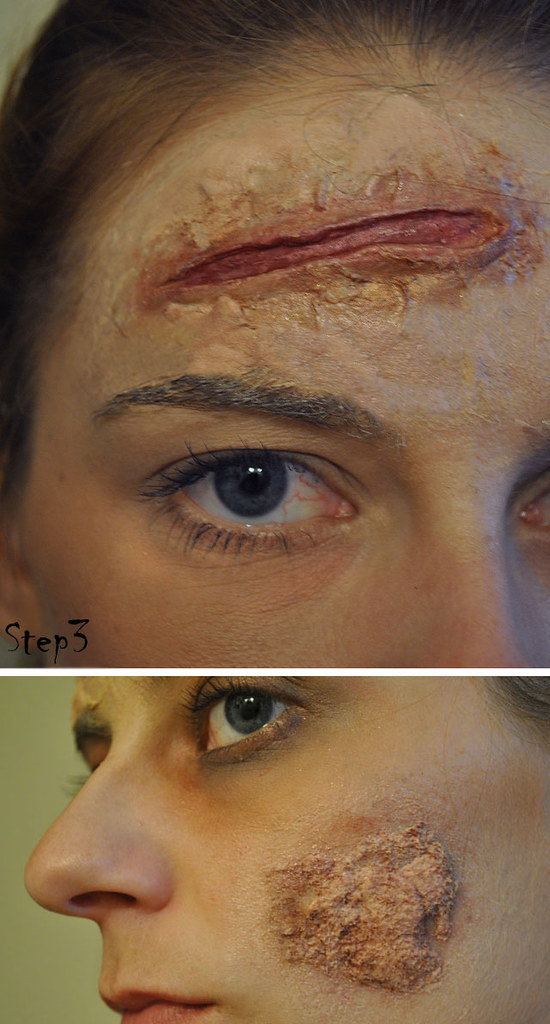
Step 1: Pick your battle wounds. Using the fake cuts you can find in most Halloween sections of your local store place your cut using spirit gum (or as I learned when I ran out of spirit gum, lash glue works just fine).

I usually put my cuts on my forehead. I've found that when placing them on my cheek they tend to come unglued if I talk or laugh too much throughout the night.


Step 2: Using "fake skin" that came in a Halloween make-up pack I bought at the drug store I made another wound on my cheek. The best way I can describe fake skin is that it feels like silly putty with little pieces of cotton in it, but it really looks like torn up face meat once you add all the make-up to it.

I also used some of the fake skin to smooth out the edges of the cut on my forehead. I've also used flesh colored latex that you can buy from Halloween stores. This tends to be easier to work with than the fake skin and gives a smoother look, but is not as readily available.

Step 3: Now it's time to add a little bruising. I use a combination of browns, purples, black, and pinks from my personal eye shadow collection, but make sure you don't use your regular make-up brushes to apply the bruising. I made that mistake once and had to buy myself a new set.

I usually start by applying the lighter browns all around the wounds and add the darker colors to smaller portions of the wounds until I'm satisfied with the result. I do the same around my eyes. Try to get a gradient going from dark black or brown closer to your eye and fade into lighter browns, purples, and pinks, mixing and adding until you look really tired...dead even.


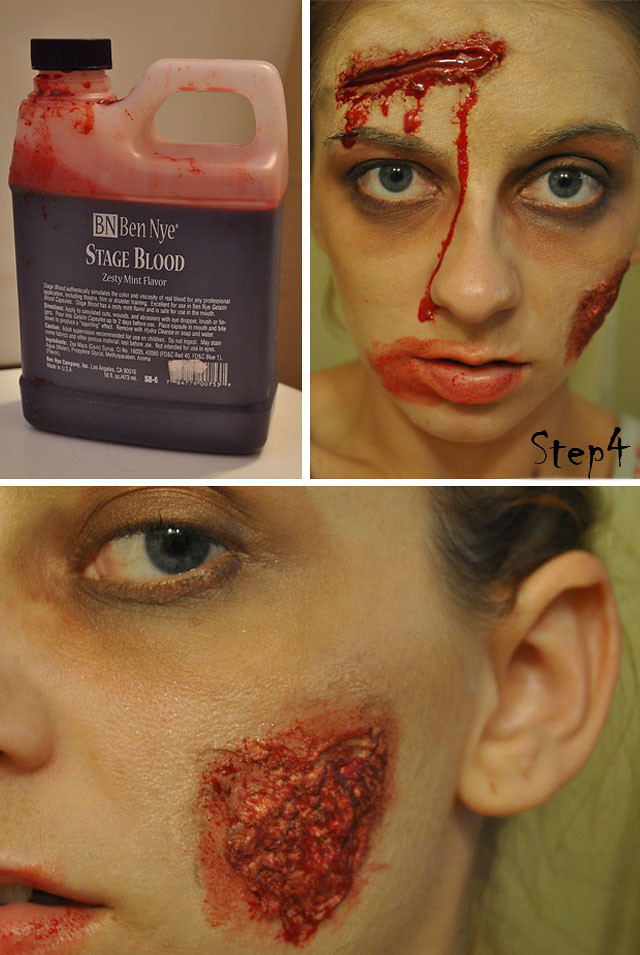
Step 4: Now comes the fun. If you're like me you have a bucket of blood lying around your house. But if you're not the kind of person who plays with zombie make-up whether it's Halloween or not...you can pick up blood in any Halloween section.

What I usually do first is dab some blood in and around my wounds. Then to make it more realistic looking I get a big glob on my finger and let it drip naturally from several points of the cut. This part will get messy so be careful where you do it.

Lastly, I smear my bloody hand over my mouth and fill in my cheek wound with more dark brown eyeshadow.


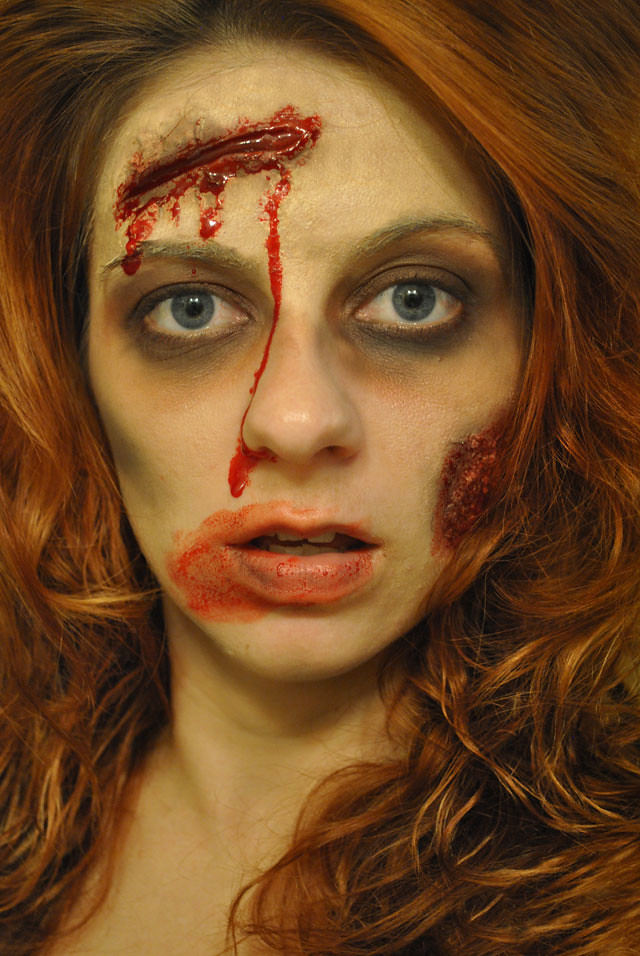
Step 5: Finally, I add black shadow to the cheeks to make them appear sunken in and touch up places that need a little more color. I also like to tease my hair and perfect my zombie stare to go with my new fab look.


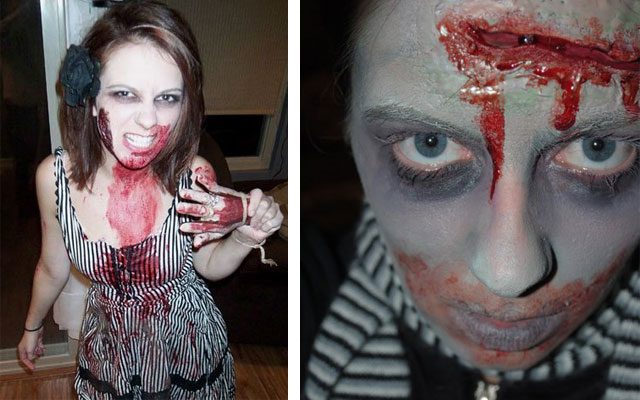
For the original Dawn of the Dead look all you have to do is add gray or green face paint before you drizzle and dab the blood on! It's a simple way to take your look from day to evening!

To complete your look all you need to do is find an old dress you don't wear anymore or an outfit you you pick up at the thrift store and give it a few rips and tears. It's better to actually tear the holes rather than cut them so they look more natural. Lastly, I put on my newly ripped garb and wipe palm prints of blood in various places. I also like to rub my clothes in the dirt/mud to make it look as though I just climbed out of a grave. If you're really hardcore you can also add dirt clumps, leaves, etc. to your ratty hair.

Now grab a fake hand covered in blood, a rubber brain, maybe a foot and go scare the neighborhood kids!


I hope you enjoyed my little tutorial! Please stop by and share some pictures if you try it out.

-------------------------------------------------------------------------------
Mary: Tera, you are one of the hottest zombies I've seen! This is such a great tutorial--thank you so much for showing my readers how to get down with their brain eating selves! ;D

Monday, April 25, 2011

Troll 2 Cupcake Tutorial


On Friday night, Matt and I went to a friend's bad movie night party. Since I love making themed cupcakes, I thought this would be a great time to make Troll 2 inspired cupcakes! In a nutshell, the movie is about a family vacationing in a small town when they discover the entire town is inhabited by goblins, who plan to turn them into plants and eat them. Yes, there are actually no trolls in Troll 2!
If you have never seen Troll 2, I included the trailer at the bottom. ;D


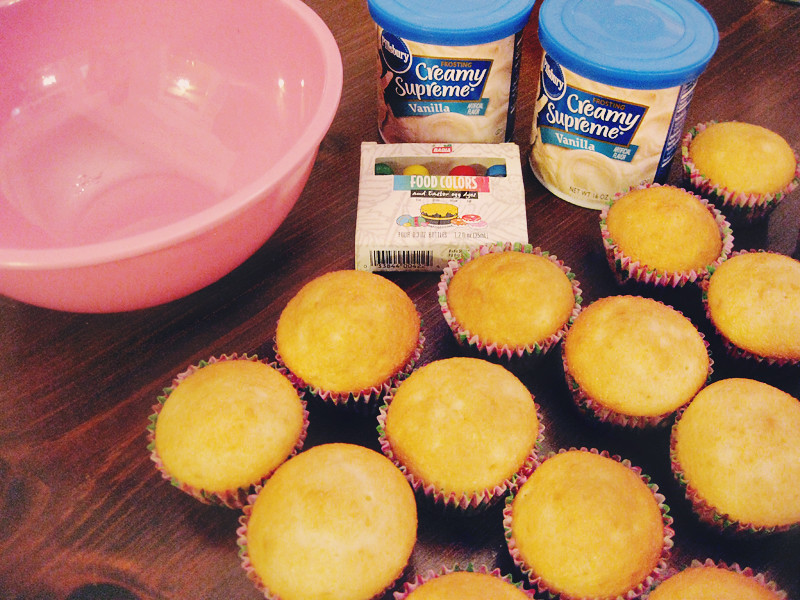
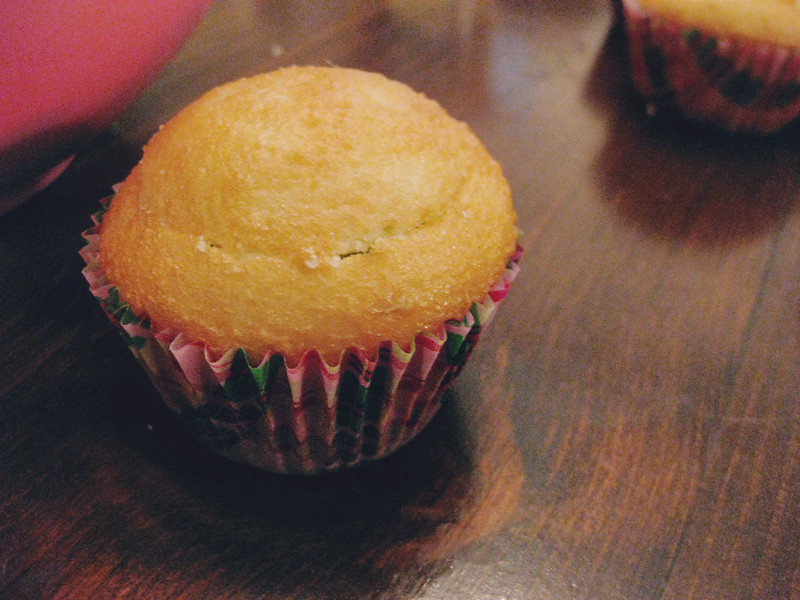
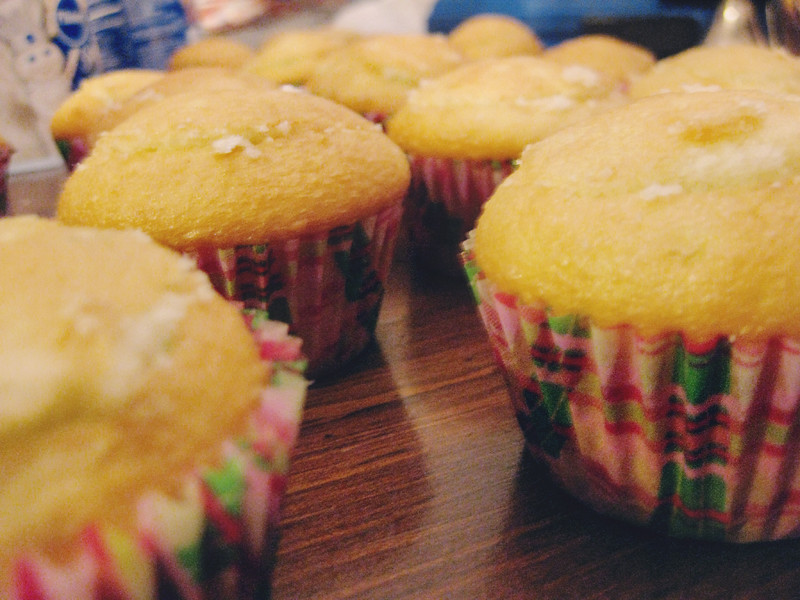
I just used a basic vanilla cake mix to make 24 cupcakes.

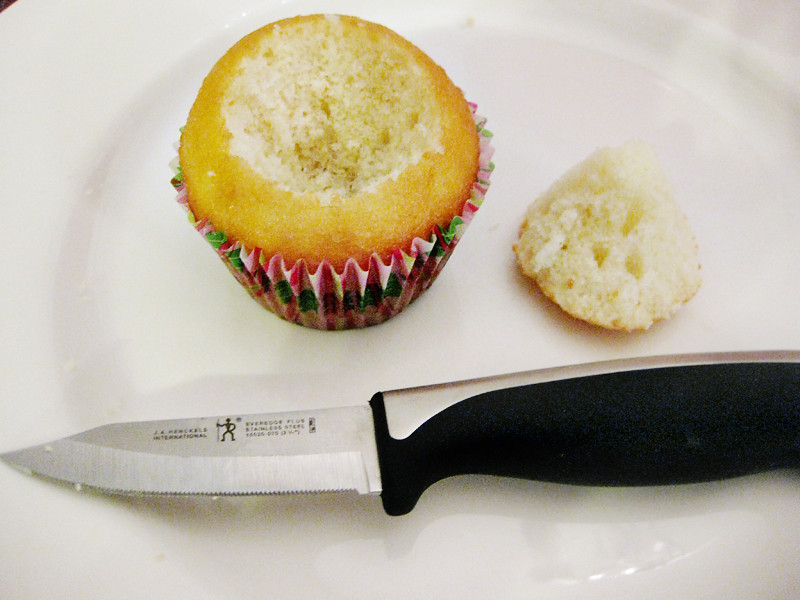
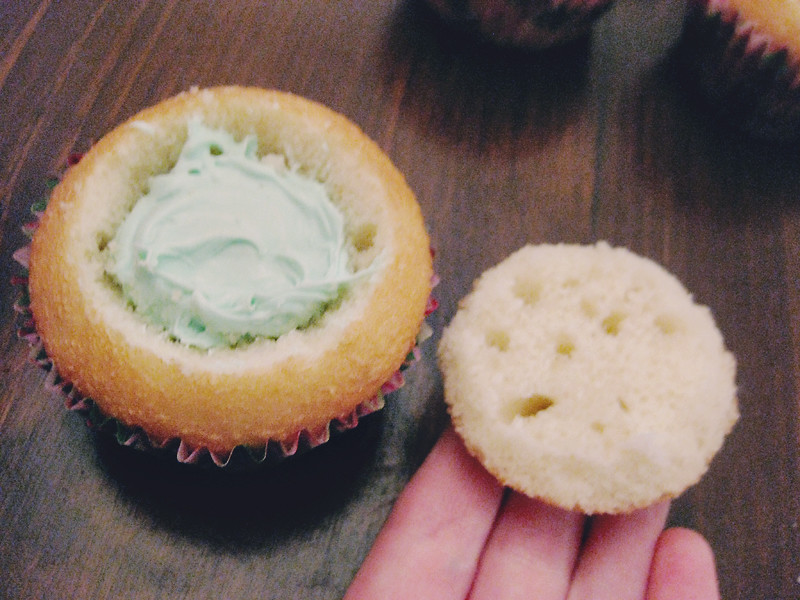
Once the cupcakes are cool, use a sharp knife to core the cupcakes. Make sure you angle the knife as you cut. You don't want to take too much from the middle and weaken the cupcake.

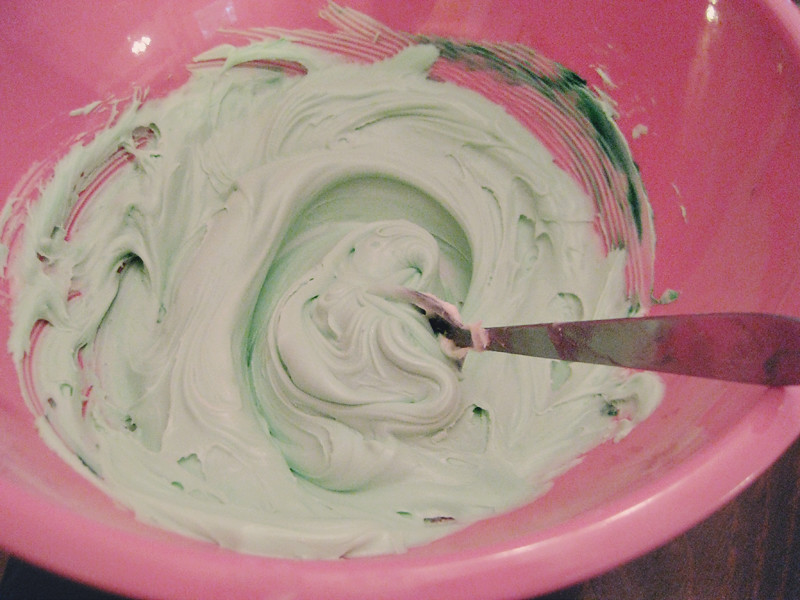
Put some white icing in a bowl and then add green food coloring. You can skip this step and just buy green icing.   [I also removed my ring after this shot because icing can get messy]

Good to go!

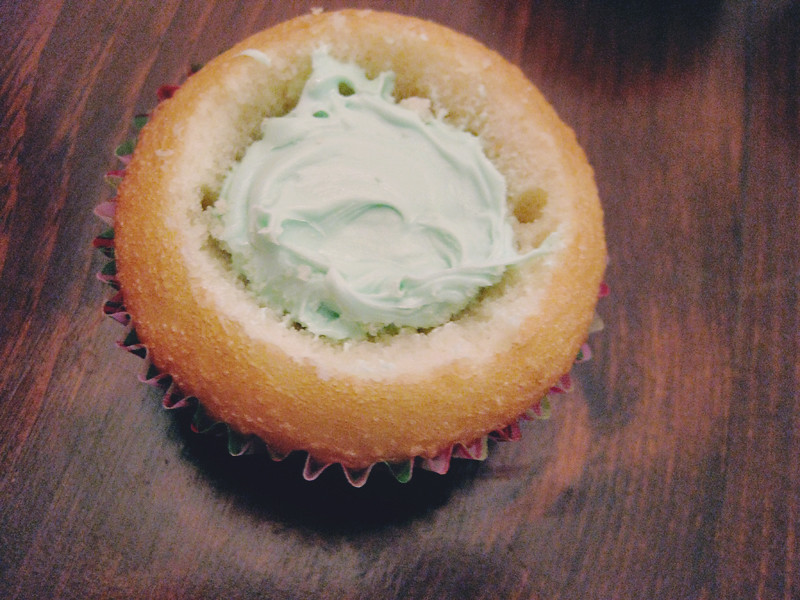
Just spoon in some of the green icing. You can take even less out of the core if you want less icing in the middle.

Once you are done filling the cupcakes with green icing it is time to put the tops back on! Take your knife and cut the cone off the bottom and then place the cap back on. The icing in the middle should act as an adhesive to hold it in place.

After you add the caps back you shouldn't see any of the green icing! If some seeps through the sides just wipe it off before icing the top.

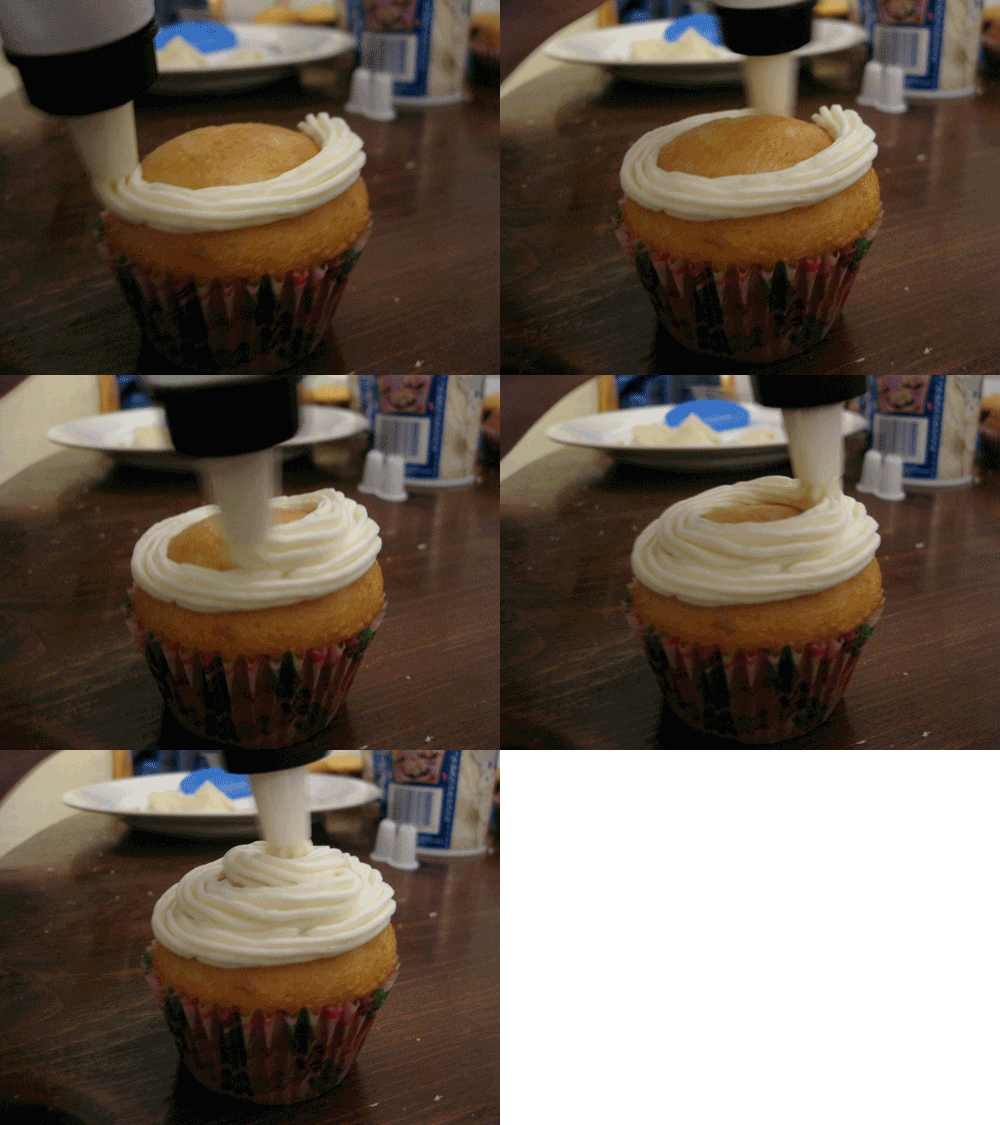
Now it's time to ice the top! I decided to ice these cupcakes with an icing bag and tip to prevent the cap from being moved or torn.  Of course I didn't have enough icing, but you just want to make sure you cover the seam from where you cored the centers.

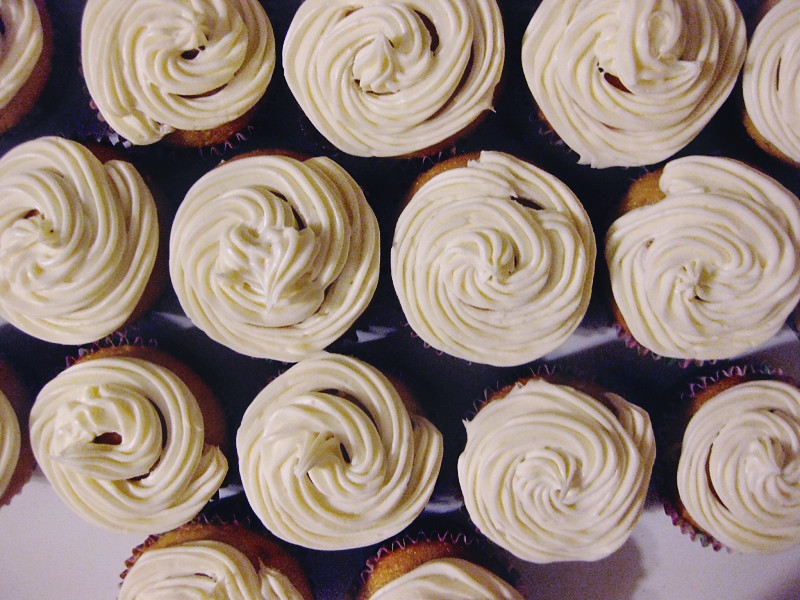
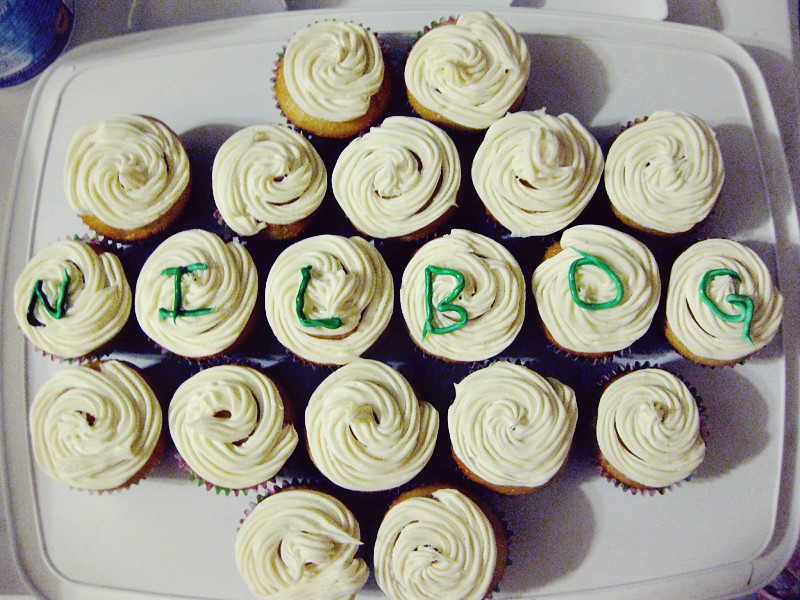
Iced and ready for one final touch!

"Nilbog is goblin spelled backwards!"  [the name of the town the family visits]

It's not until your family and friends bite into your yummy cupcakes that they realize it's a trap! ;D

Hope you enjoyed my first tutorial as much as I enjoyed creating it! 


Thursday, April 7, 2011

Blogiversary: D.I.Y earring with The Demure Muse!


I've known Katrina online for....a lot of years now. heh  She's always been fashionable, creative, and just an all around super sweet girl. So of course I asked her to be apart of my blogiversary and was excited when she sent me this fun tutorial! 
-----------------------------------------------------------------------------------------------------------------


Hi everyone! I'm Katrina from The Demure Muse! Thanks so much for having me over here at Mary Rebecca's blog. I can usually be found blogging about my daily outfits or kitchen experiments, but today I'm here to share with you one of my most recent craft projects. I'm so excited to celebrate her blogiversary by guest posting a DIY project. :)


Here's a great project that you can complete if you have a bunch of necklaces that you no longer wear. What you'll need:
- two 6mm jump rings
- two or three necklaces (different textures, colors, and link sizes help!)
- a pair of earring hooks
- jewelry-making pliers (a needle-nose works best)

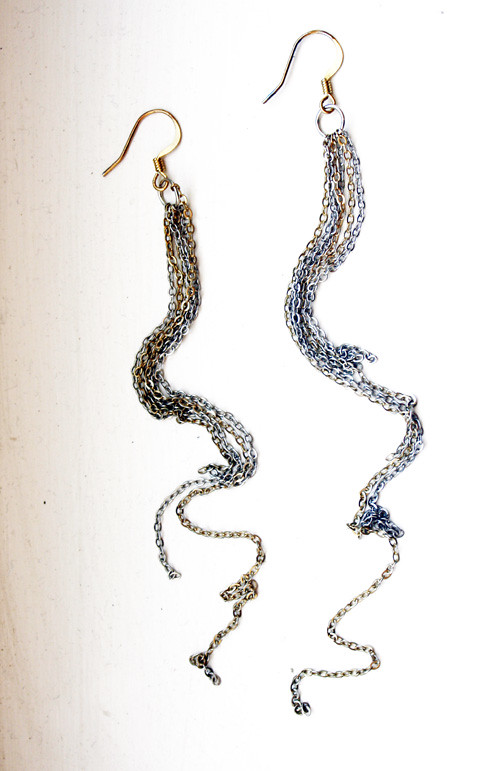
Step 1: Take apart the necklaces and cut up the chain into different lengths. The full length of the earrings can be as long (or short) as you'd like. I kept my earrings symmetrical, so I made sure to cut 2 pieces from each necklace of the same length. 

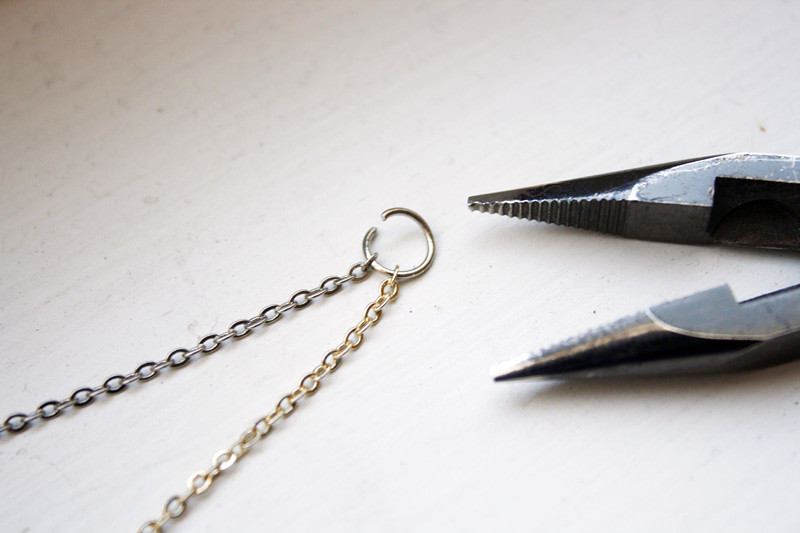
Step 2: Open one of the 6mm jump rings and begin to "thread" the chains onto the ring. I alternated the gold and silver chains, also staggering the lengths of the chains so they looked like a group of organized chaos!


Step 3: Attach the jump ring to the earring hook. 

Step 4: Rinse & repeat with the other side of the earring hook.


TA-DA! You've got yourself a new pair of earrings!

Tuesday, April 5, 2011

Blogiversary: Bunting Tutorial and Giveaway


 Let's start this blogiversary celebration off right! Keep reading for a great bunting tutorial and your chance to win a custom made bunting from Tanie herself.

--------------------------------------------------------------------

Hi everyone! it's Tanie from cupcake wishes & unicorn dreams. I'm so thrilled to help Mary Rebecca celebrate her first blogaversary with this fun bunting tutorial and giveaway!

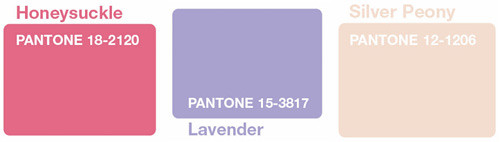
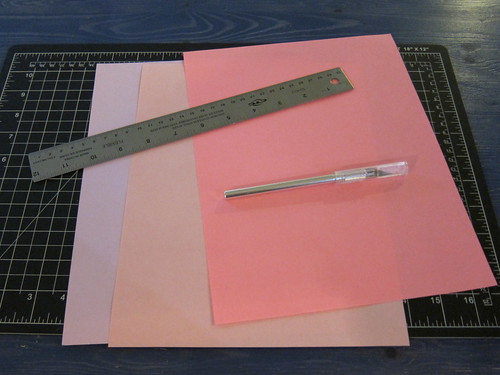
You can use any colours (or patterns!) of paper you want; I like to use at least three. For inspiration Mary Rebecca suggested I use some of the Pantone spring 2011 fashion colours, and we decided on Honeysuckle, Lavender and Silver Peony.
00mrbuntingpantonespringcolours
This particular bunting turned out SUPER girly, but you can easily dial it down with brighter or darker colours.

Hello Spring! Bunting
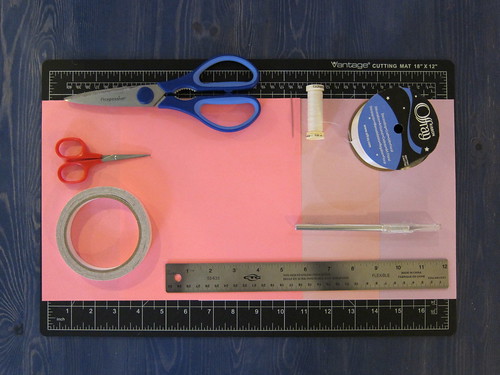
01mrbsupplies
supplies:
3 or more sheets of different coloured paper
1½" or 2" wide ribbon
thread to match the ribbon
double-sided tape
optional: fray-stop or clear nail polish (not pictured)

equipment:
cutting mat
large scissors (for cutting ribbon)
small scissors (for cutting tape)
x-acto knife (for cutting paper)
metal edged ruler
needle
iron (not pictured)

part one: Ribbon
1. I used an antique white satin ribbon for this, but any wide ribbon will work. Cut it to the approximate length you want your bunting to be (I used four feet). If necessary paint a little fray-stop on the ends.

2. Next you need to iron your ribbon in half. A normal person would do this on an ironing board, but I don't have one so I used a cutting board and some parchment paper (to stop the iron from sticking to the cutting board). Only iron a few inches at a time- it's easier to keep the edges lined up this way.
03mrbuntingironing2

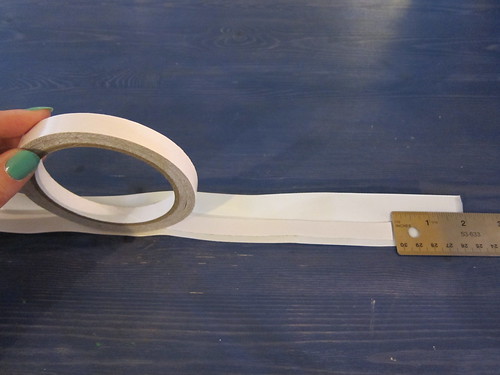
3. After ironing, open your ribbon back up and apply double-sided tape to the lower half. Use the tape that has paper backing on it, not the kind that is just two naked sticky sides. Leave a couple inches at each end tape-free. You might need to put something on the ribbon to hold it open (like my ruler in the picture below), but that just means you did a good job of ironing!
05mrbuntingtapingribbon

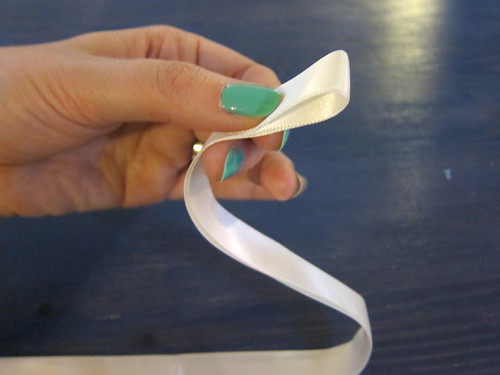
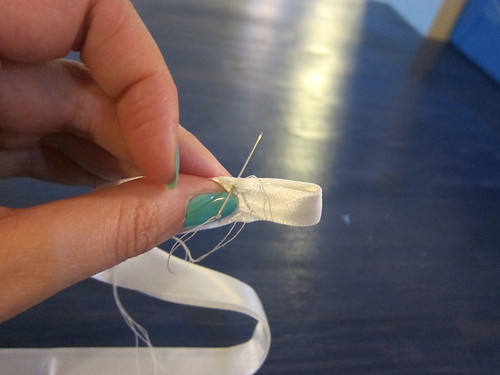
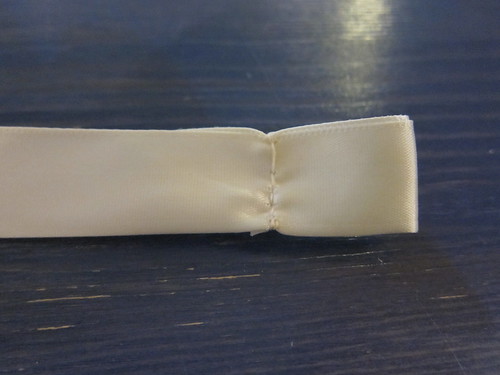
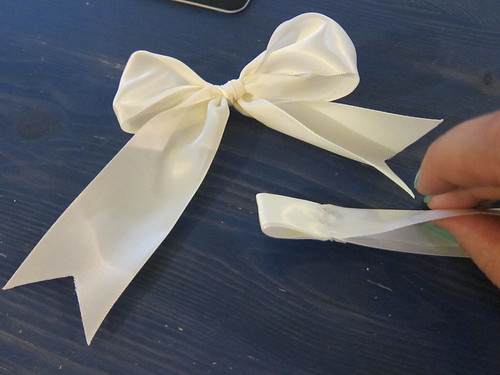
4. Sew loops at the ends of your ribbon. This makes it easier to hang the bunting with pins or on hooks, although you can tape it up as well. But sew the loops anyway, it's classier than just a raw edge! Simply fold the ribbon ends over and sew them in place. It doesn't matter which way you fold (to the front/non-tape side, or back/tape side), just make sure you don't make the loops so big that you're sewing through the tape- it's doable but your needle will get all sticky which is just a hassle.
07mrbuntingloopfold
08mrbuntingloopsew
09mrbuntingloopfront
If you've decided not to make bows, skip ahead to part two!

5. Cut two pieces of ribbon that are the same length. Tying bows uses a LOT of ribbon; it's best to cut your ribbon pieces a little long and trim them down if necessary. I used 18" for each one and ended up with very small bows.

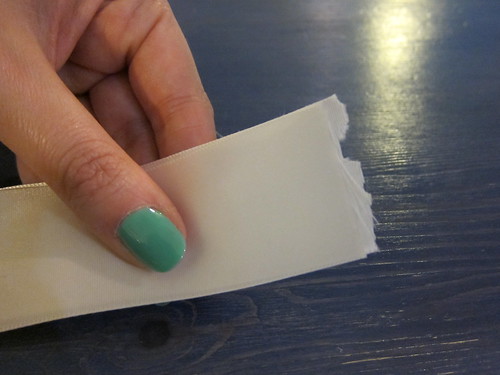
6. Cut notched ends into your bow ribbons. First fold each ribbon in half widthways so the ends are lined up
11mrbuntingbowends1
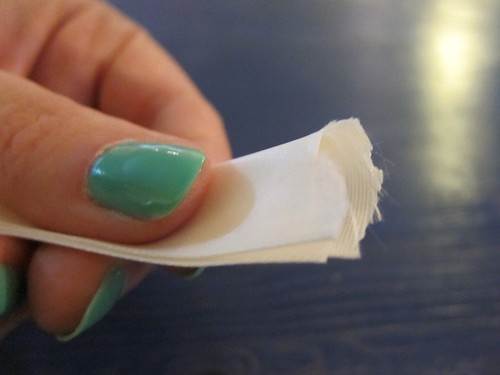
... then fold lengthways...
12mrbuntingbowends2
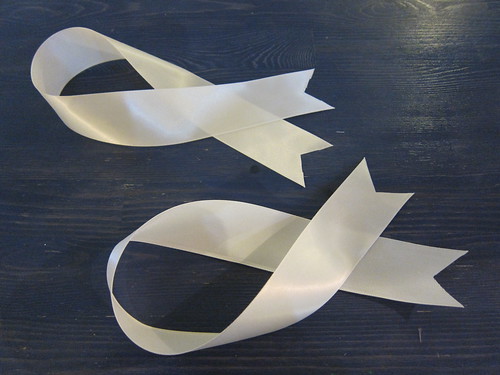
... and using very sharp scissors, cut at an angle towards the folded edge. You'll end up with something like this:
13mrbuntingbowribbons

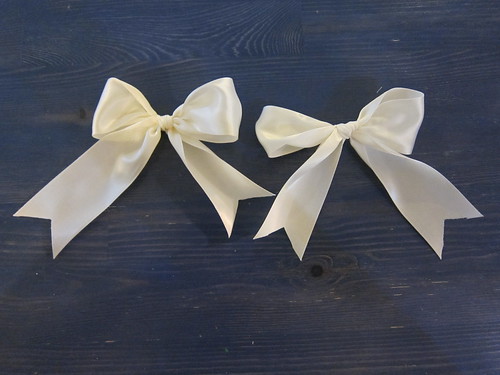
7. Tie your ribbons into bows! I couldn't take pictures of the bow-tying process since it takes two hands, but I use the "Bunny Ears" method. Adjust your bows until they look all pretty and tighten them.
14mrbuntingbows

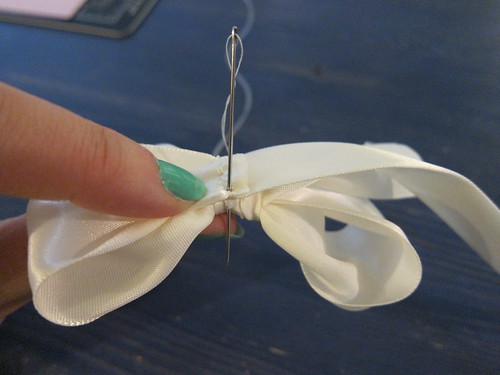
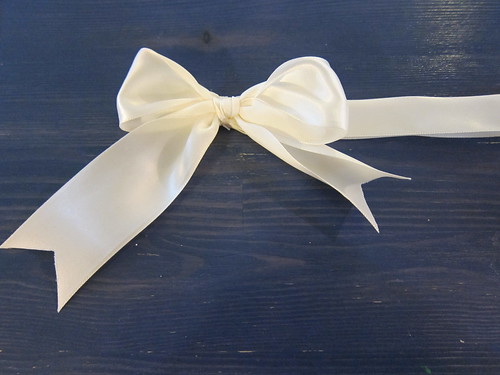
8. Sew your bows onto the front of the ribbon, at around the same spot at the seam where you sewed the loops. Remember that the folded edge of the ribbon is the top, the open edge is the bottom and the tape is on the inside of the back, and sew your bows accordingly.
15mrbuntingbowandloop
16mrbuntingbowandloopsewing
17mrbuntingbowandloopsewnfront

part two: Pennants
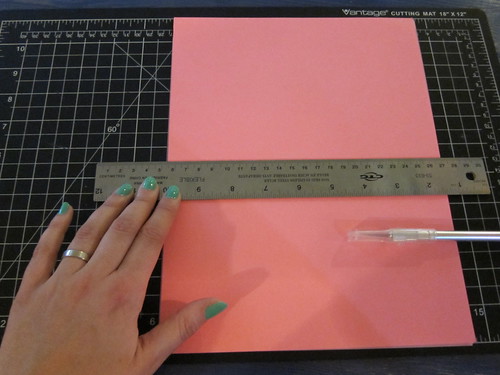
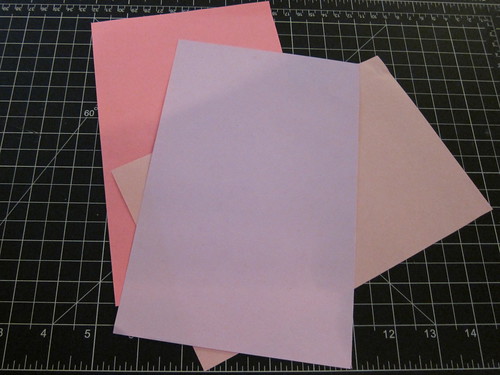
1. Cut your pennants. I used regular ol' 8½"x11" paper in three colours.
19mrbuntingpapers
If your x-acto knife is nice and sharp you can cut all three pieces at once and save yourself some time. Cut them in half widthways so you have sheets 8½"x5½"
20mrbuntingpapercutting
21mrbuntingpaperscut
Depending on how long you make your bunting you might need more or less paper, but 3 half-sheets made more than I needed for four feet of bunting.

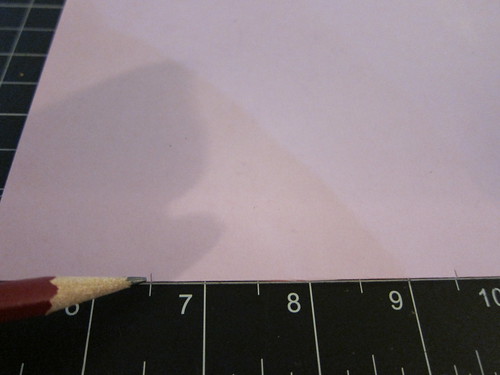
2. Mark the long edges of your paper so you know where to cut. I wanted pennants 3" wide at the top so I made marks at 3 and 6 inches along the top and 1½, 4½ and 7½ inches at the bottom.
22mrbuntingpapermarks

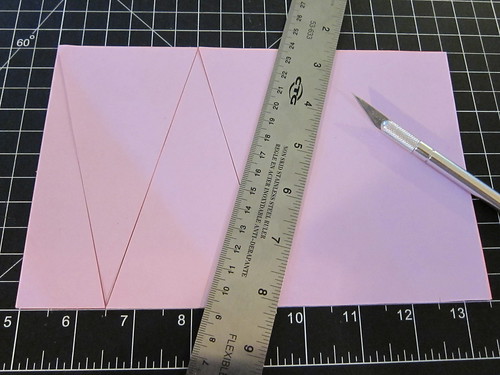
3. Cut your pennants using your x-acto knife and metal edged ruler. You can move the cut pennants out of the way as you go, I just left them in place to show you how how the cutting looks.
23mrbuntingpennantcutting
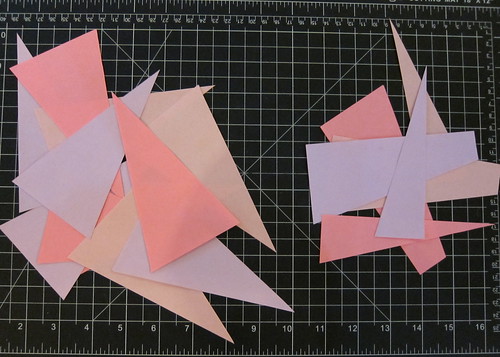
When you are done you'll have four pennants in each colour and a bunch of scraps you can use for other crafts, like confetti or smaller bunting.
24mrbuntingpennants

part 3: Assembly
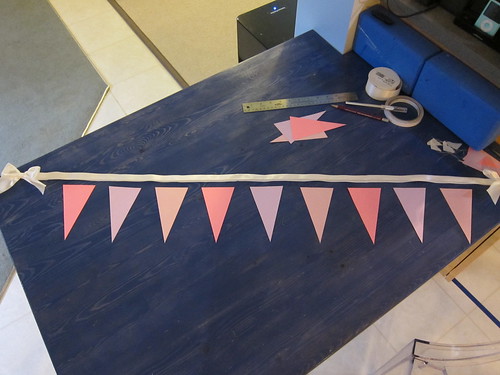
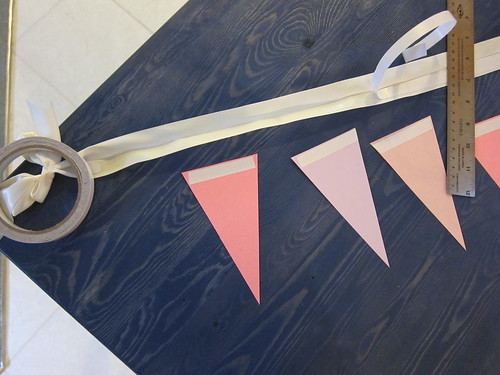
1. Lay out your ribbon & pennants to see how many of the latter you'll need to use and how you want to space them. I like to leave a little extra space at each end and about an inch and a half to two inches between each pennant, although I don't measure this step- I just eyeball it. For this bunting I used nine pennants
25mrbuntinglayout

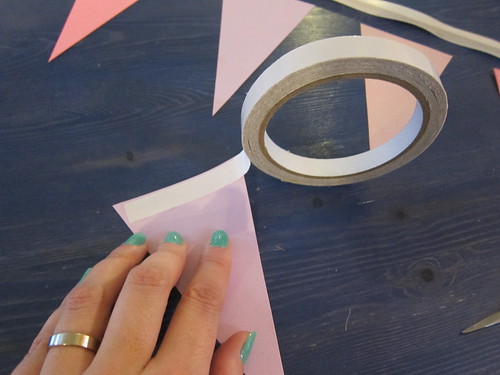
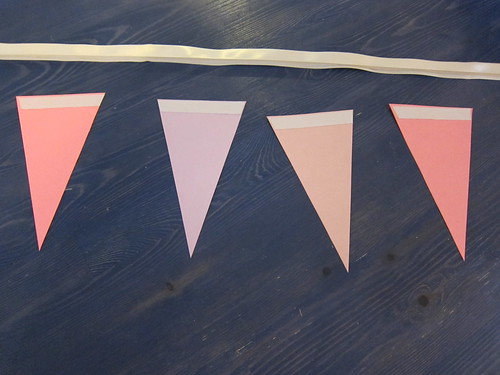
2. Tape your pennants. Apply a strip of double sided tape to the top of each pennant.
26mrbuntingpennanttaping
27mrbuntingpennantstaped

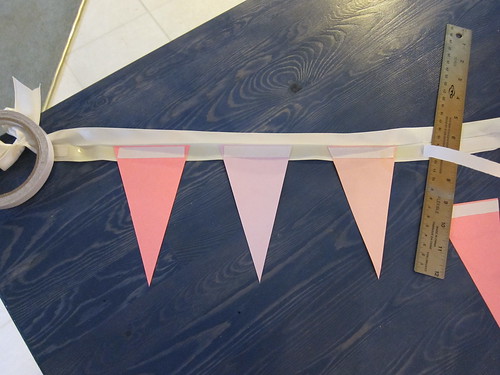
3. Open your ribbon back up (again, you may need to weigh it down with something to keep it open) and start peeling the backing off the double stick tape. Don't peel all the backing right away; it's best to work with just a small section at a time.
28mrbuntingassembly1
29mrbuntingassembly2

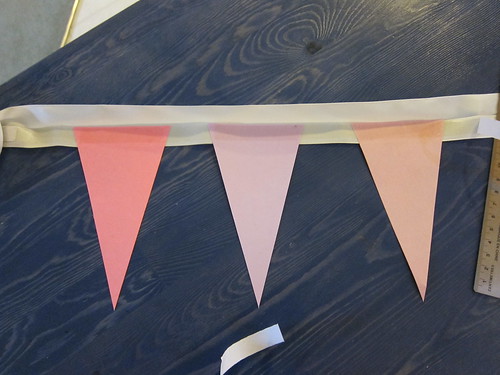
4. Place two or three pennants at a time, tape side UP, to the exposed tape in the ribbon. Peel the backing off the tape on the pennants, and press the ribbon back over it. Keep doing this until you have all the pennants in place.
30mrbuntingassembly3
31mrbuntingasembly4

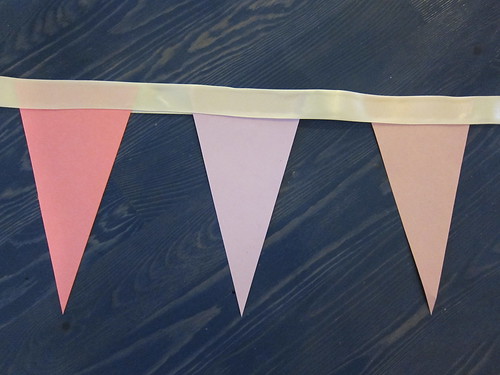
5. Hang your finished bunting and enjoy!
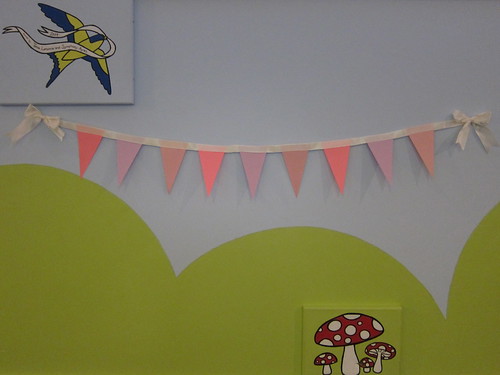
32mrbuntingfinished


GIVEAWAY!

Tanie is offering the bunting she created in the tutorial above to one lucky reader!

To enter:

You must be a Google Friend Connect follower of Mary Rebecca
1. Leave a comment with your favorite Spring accessory!
For additional entries, leave a separate comment for each action.
2. Become a follower of cupcake wishes & unicorn dreams
3. Follow @mary_rebecca and @taniewanie on Twitter
4. Favorite Unicorn Parade on Etsy
5. Blog, facebook, or tweet about this giveaway (make sure to include @mary_rebecca and @taniewanie in your tweet) and include the link (one entry each)
Feel free to use this tweet:

I just entered a #GIVEAWAY for a spring inspired bunting by @taniewanie on @mary_rebecca 's blog! http://tiny.cc/191u5

6. Purchase an item from Tanie's shop and get (5) five additional entries! Leave transaction # as a separate comment. 

This giveaway closes on Monday, April 11, 2011 at 11:00 PM EST
International entries welcome.

COMMENTS ARE NOW CLOSED.

LinkWithin

Related Posts Plugin for WordPress, Blogger...