

Hi! I'm Tera and I run a blog over at TeraSue.com
I have always loved horror movies. Especially zombie movies. Whether it's the original Dawn of the Dead or the remake, fast zombies, slow zombies, funny zombies (Shaun of the Dead), shark eating zombies (Zombie). You name it, I like it.
I don't think it's a surprise to anyone who knows me that my favorite month is October so when Mary offered up some of her blog space for October themed guest posts I jumped at the chance to share my DIY. So without further ado I present to you: How To Become a Zombie.

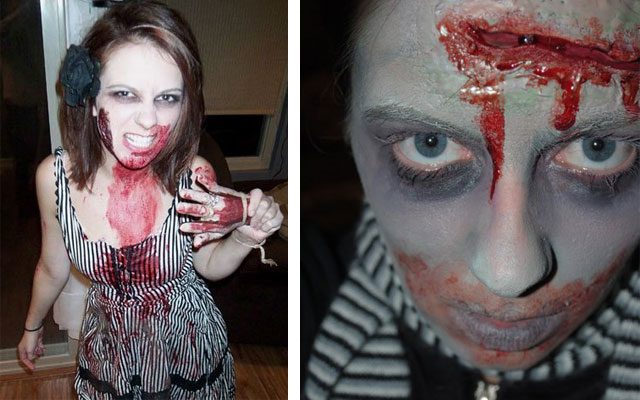
Because two of my favorite zombie movies are the Dawn of the Deads I decided to do a two parter. Whether you prefer the old school painted face zombie, or the new sexy flesh tone zombie it's easy to create these looks for your next zombie event.
Step 1: Pick your battle wounds. Using the fake cuts you can find in most Halloween sections of your local store place your cut using spirit gum (or as I learned when I ran out of spirit gum, lash glue works just fine).
I usually put my cuts on my forehead. I've found that when placing them on my cheek they tend to come unglued if I talk or laugh too much throughout the night.
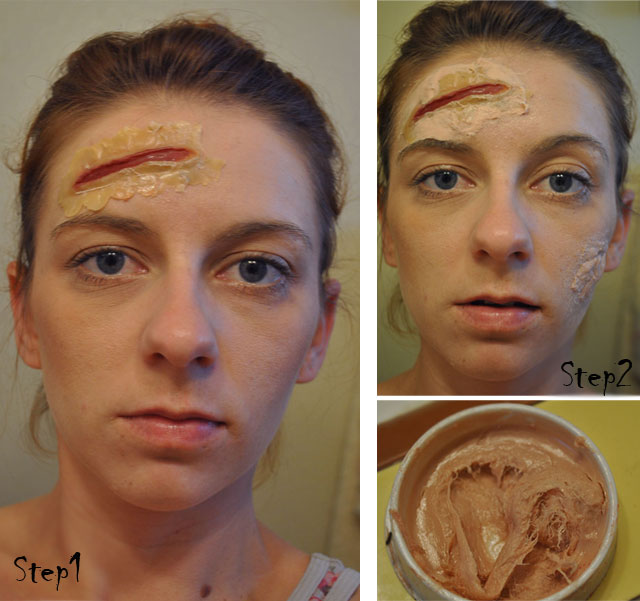
Step 2: Using "fake skin" that came in a Halloween make-up pack I bought at the drug store I made another wound on my cheek. The best way I can describe fake skin is that it feels like silly putty with little pieces of cotton in it, but it really looks like torn up face meat once you add all the make-up to it.
I also used some of the fake skin to smooth out the edges of the cut on my forehead. I've also used flesh colored latex that you can buy from Halloween stores. This tends to be easier to work with than the fake skin and gives a smoother look, but is not as readily available.
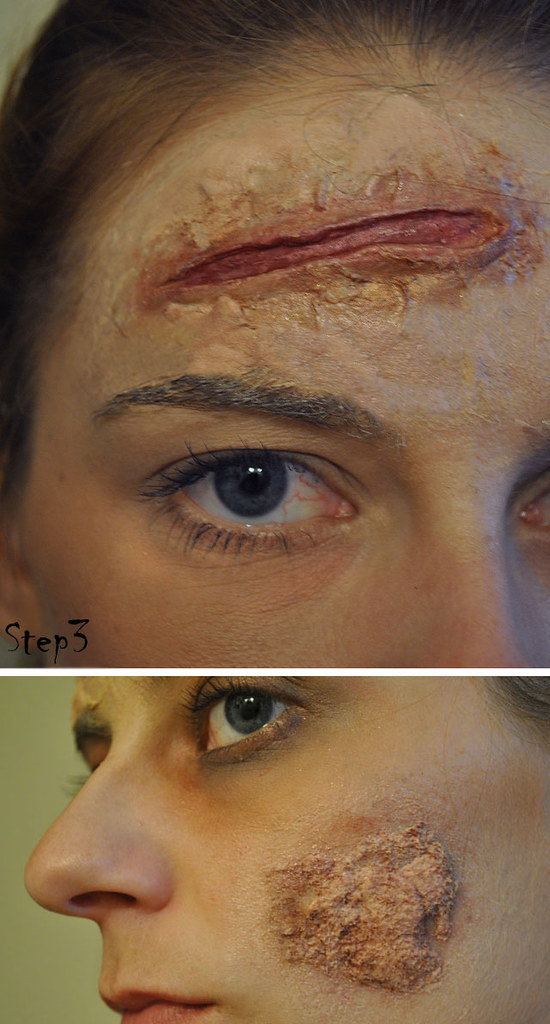
Step 3: Now it's time to add a little bruising. I use a combination of browns, purples, black, and pinks from my personal eye shadow collection, but make sure you don't use your regular make-up brushes to apply the bruising. I made that mistake once and had to buy myself a new set.
I usually start by applying the lighter browns all around the wounds and add the darker colors to smaller portions of the wounds until I'm satisfied with the result. I do the same around my eyes. Try to get a gradient going from dark black or brown closer to your eye and fade into lighter browns, purples, and pinks, mixing and adding until you look really tired...dead even.
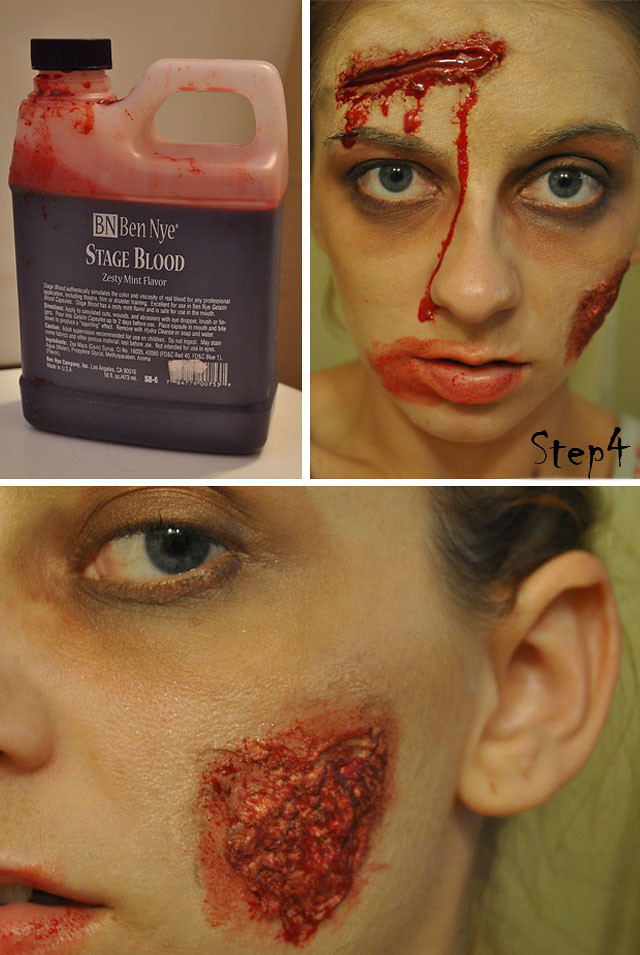
Step 4: Now comes the fun. If you're like me you have a bucket of blood lying around your house. But if you're not the kind of person who plays with zombie make-up whether it's Halloween or not...you can pick up blood in any Halloween section.
What I usually do first is dab some blood in and around my wounds. Then to make it more realistic looking I get a big glob on my finger and let it drip naturally from several points of the cut. This part will get messy so be careful where you do it.
Lastly, I smear my bloody hand over my mouth and fill in my cheek wound with more dark brown eyeshadow.
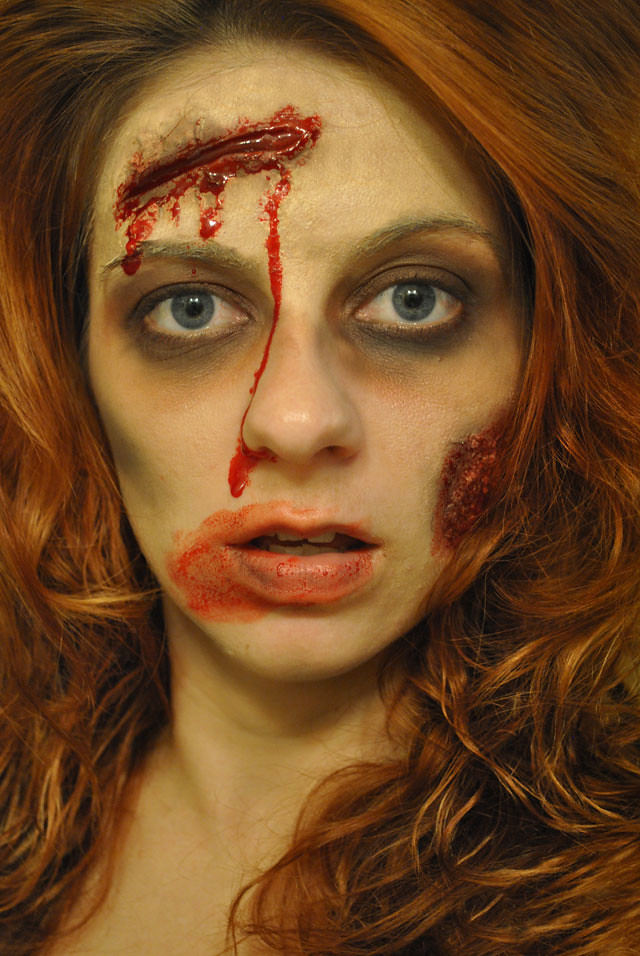
Step 5: Finally, I add black shadow to the cheeks to make them appear sunken in and touch up places that need a little more color. I also like to tease my hair and perfect my zombie stare to go with my new fab look.
For the original Dawn of the Dead look all you have to do is add gray or green face paint before you drizzle and dab the blood on! It's a simple way to take your look from day to evening!
To complete your look all you need to do is find an old dress you don't wear anymore or an outfit you you pick up at the thrift store and give it a few rips and tears. It's better to actually tear the holes rather than cut them so they look more natural. Lastly, I put on my newly ripped garb and wipe palm prints of blood in various places. I also like to rub my clothes in the dirt/mud to make it look as though I just climbed out of a grave. If you're really hardcore you can also add dirt clumps, leaves, etc. to your ratty hair.
Now grab a fake hand covered in blood, a rubber brain, maybe a foot and go scare the neighborhood kids!
I hope you enjoyed my little tutorial! Please stop by and share some pictures if you try it out.
-------------------------------------------------------------------------------
Mary: Tera, you are one of the hottest zombies I've seen! This is such a great tutorial--thank you so much for showing my readers how to get down with their brain eating selves! ;D

I love your work
ReplyDelete