

Let's start this blogiversary celebration off right! Keep reading for a great bunting tutorial and your chance to win a custom made bunting from Tanie herself.
--------------------------------------------------------------------
Hi everyone! it's Tanie from cupcake wishes & unicorn dreams. I'm so thrilled to help Mary Rebecca celebrate her first blogaversary with this fun bunting tutorial and giveaway!
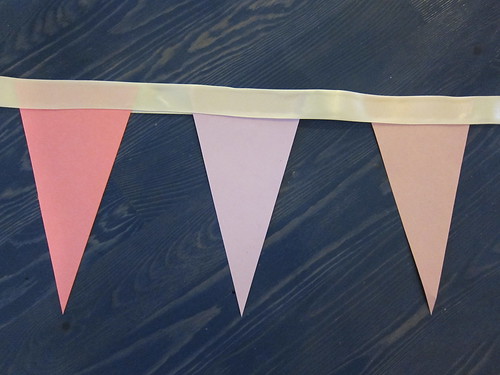
You can use any colours (or patterns!) of paper you want; I like to use at least three. For inspiration Mary Rebecca suggested I use some of the Pantone spring 2011 fashion colours, and we decided on Honeysuckle, Lavender and Silver Peony.
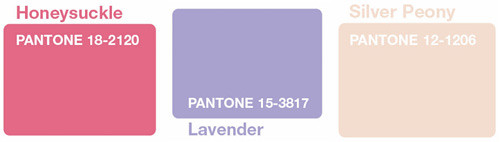
This particular bunting turned out SUPER girly, but you can easily dial it down with brighter or darker colours.
Hello Spring! Bunting
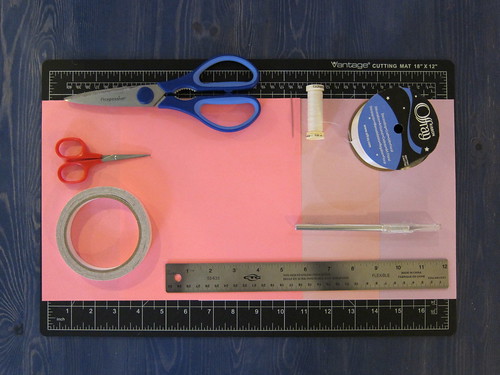
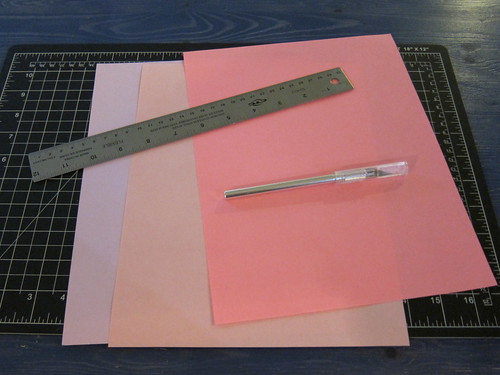
supplies:
3 or more sheets of different coloured paper
1½" or 2" wide ribbon
thread to match the ribbon
double-sided tape
optional: fray-stop or clear nail polish (not pictured)
equipment:
cutting mat
large scissors (for cutting ribbon)
small scissors (for cutting tape)
x-acto knife (for cutting paper)
metal edged ruler
needle
iron (not pictured)
part one: Ribbon
1. I used an antique white satin ribbon for this, but any wide ribbon will work. Cut it to the approximate length you want your bunting to be (I used four feet). If necessary paint a little fray-stop on the ends.
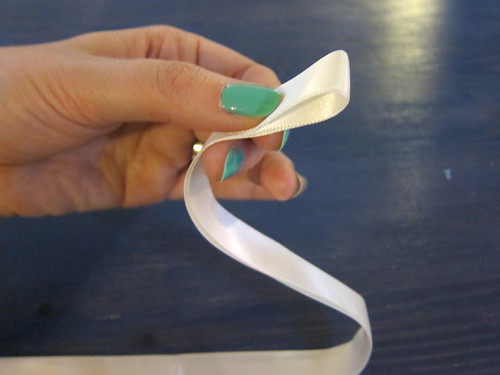
2. Next you need to iron your ribbon in half. A normal person would do this on an ironing board, but I don't have one so I used a cutting board and some parchment paper (to stop the iron from sticking to the cutting board). Only iron a few inches at a time- it's easier to keep the edges lined up this way.

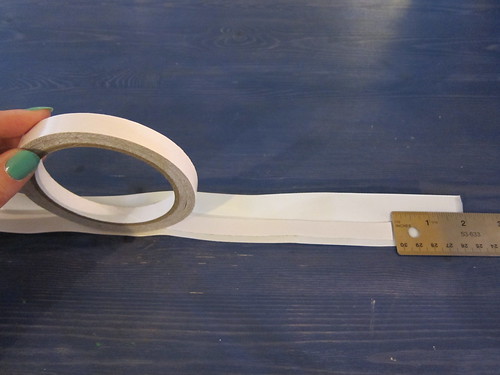
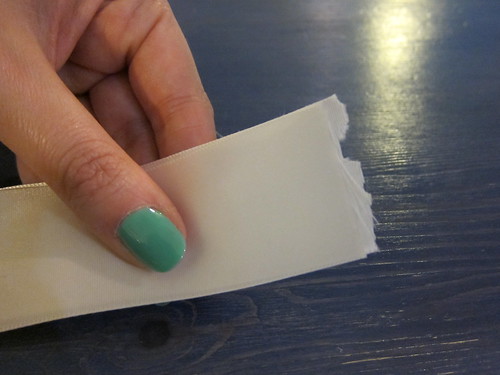
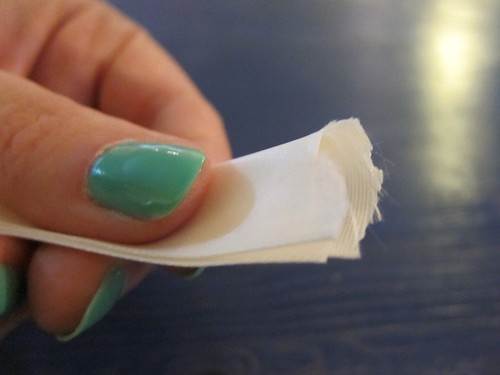
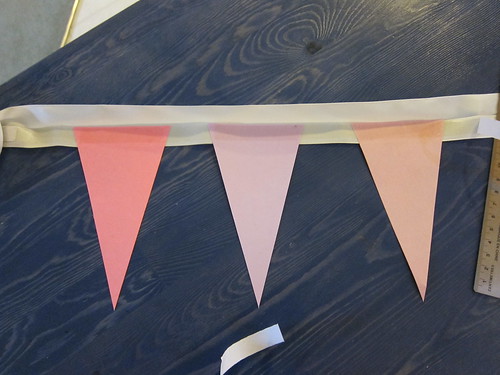
3. After ironing, open your ribbon back up and apply double-sided tape to the lower half. Use the tape that has paper backing on it, not the kind that is just two naked sticky sides. Leave a couple inches at each end tape-free. You might need to put something on the ribbon to hold it open (like my ruler in the picture below), but that just means you did a good job of ironing!
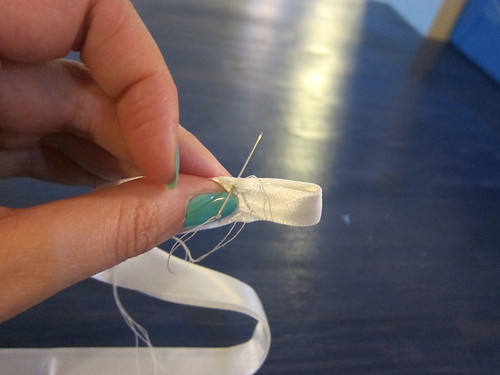
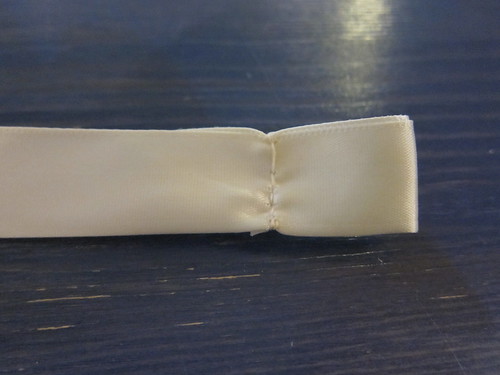
4. Sew loops at the ends of your ribbon. This makes it easier to hang the bunting with pins or on hooks, although you can tape it up as well. But sew the loops anyway, it's classier than just a raw edge! Simply fold the ribbon ends over and sew them in place. It doesn't matter which way you fold (to the front/non-tape side, or back/tape side), just make sure you don't make the loops so big that you're sewing through the tape- it's doable but your needle will get all sticky which is just a hassle.
If you've decided not to make bows, skip ahead to part two!
5. Cut two pieces of ribbon that are the same length. Tying bows uses a LOT of ribbon; it's best to cut your ribbon pieces a little long and trim them down if necessary. I used 18" for each one and ended up with very small bows.
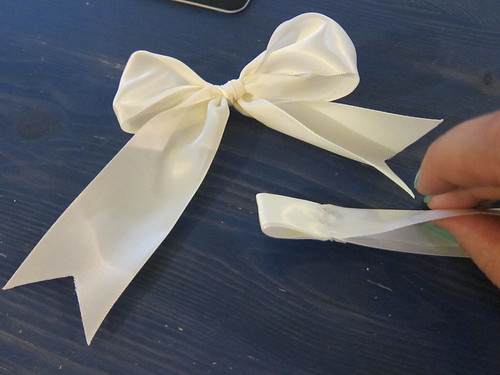
6. Cut notched ends into your bow ribbons. First fold each ribbon in half widthways so the ends are lined up
... then fold lengthways...
... and using very sharp scissors, cut at an angle towards the folded edge. You'll end up with something like this:

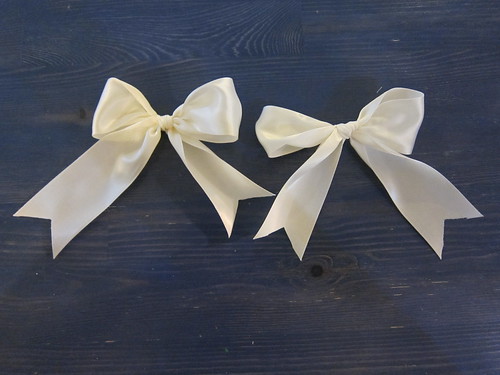
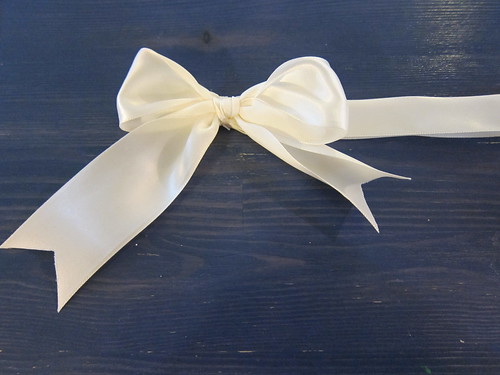
7. Tie your ribbons into bows! I couldn't take pictures of the bow-tying process since it takes two hands, but I use the "Bunny Ears" method. Adjust your bows until they look all pretty and tighten them.
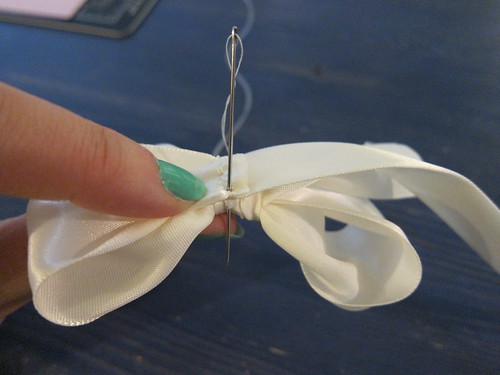
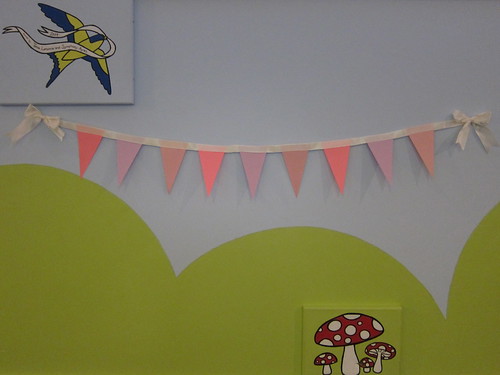
8. Sew your bows onto the front of the ribbon, at around the same spot at the seam where you sewed the loops. Remember that the folded edge of the ribbon is the top, the open edge is the bottom and the tape is on the inside of the back, and sew your bows accordingly.
part two: Pennants
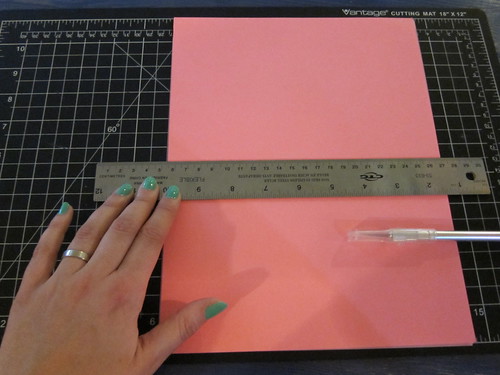
1. Cut your pennants. I used regular ol' 8½"x11" paper in three colours.
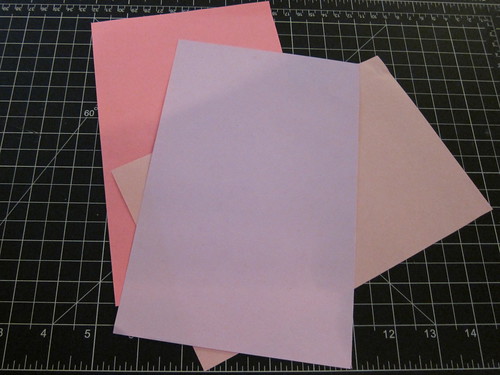
If your x-acto knife is nice and sharp you can cut all three pieces at once and save yourself some time. Cut them in half widthways so you have sheets 8½"x5½"
Depending on how long you make your bunting you might need more or less paper, but 3 half-sheets made more than I needed for four feet of bunting.
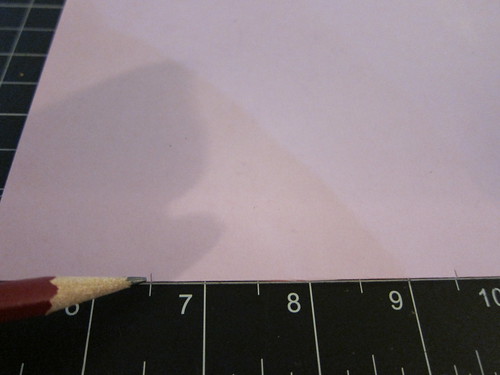
2. Mark the long edges of your paper so you know where to cut. I wanted pennants 3" wide at the top so I made marks at 3 and 6 inches along the top and 1½, 4½ and 7½ inches at the bottom.
3. Cut your pennants using your x-acto knife and metal edged ruler. You can move the cut pennants out of the way as you go, I just left them in place to show you how how the cutting looks.
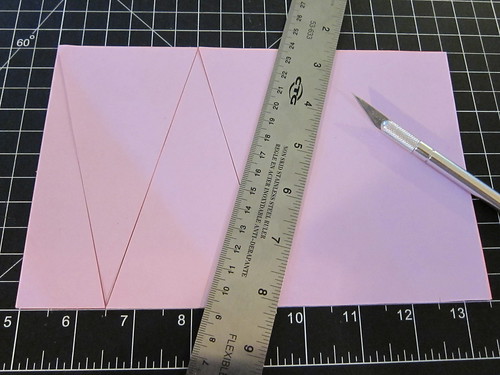
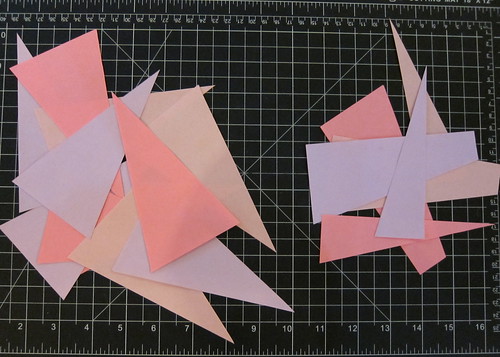
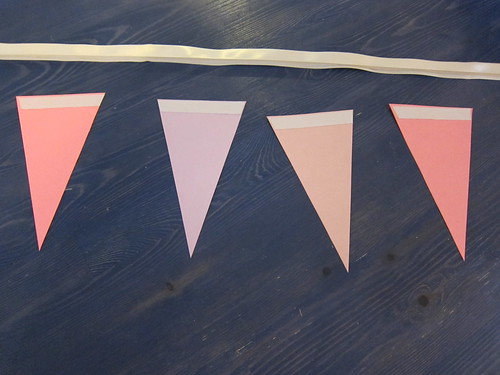
When you are done you'll have four pennants in each colour and a bunch of scraps you can use for other crafts, like confetti or smaller bunting.
part 3: Assembly
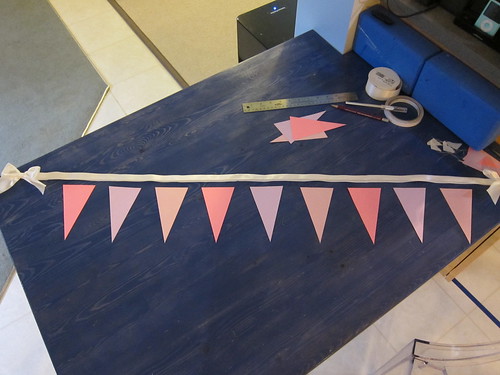
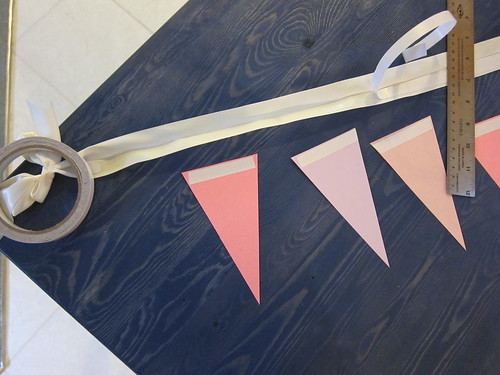
1. Lay out your ribbon & pennants to see how many of the latter you'll need to use and how you want to space them. I like to leave a little extra space at each end and about an inch and a half to two inches between each pennant, although I don't measure this step- I just eyeball it. For this bunting I used nine pennants
2. Tape your pennants. Apply a strip of double sided tape to the top of each pennant.
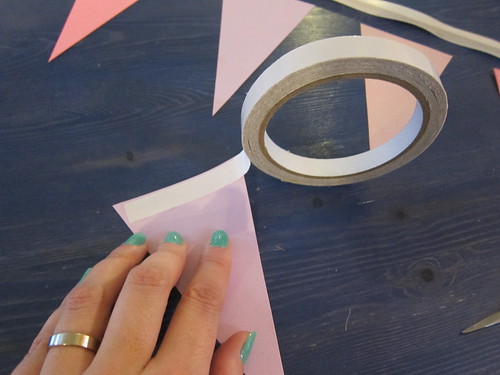
3. Open your ribbon back up (again, you may need to weigh it down with something to keep it open) and start peeling the backing off the double stick tape. Don't peel all the backing right away; it's best to work with just a small section at a time.
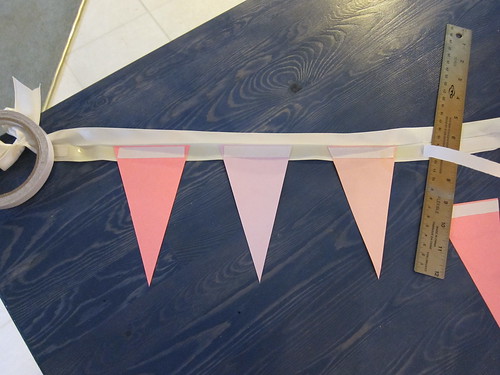
4. Place two or three pennants at a time, tape side UP, to the exposed tape in the ribbon. Peel the backing off the tape on the pennants, and press the ribbon back over it. Keep doing this until you have all the pennants in place.
5. Hang your finished bunting and enjoy!
GIVEAWAY!
Tanie is offering the bunting she created in the tutorial above to one lucky reader!
To enter:
You must be a Google Friend Connect follower of Mary Rebecca
1. Leave a comment with your favorite Spring accessory!
For additional entries, leave a separate comment for each action.
2. Become a follower of cupcake wishes & unicorn dreams
3. Follow @mary_rebecca and @taniewanie on Twitter
4. Favorite Unicorn Parade on Etsy
2. Become a follower of cupcake wishes & unicorn dreams
3. Follow @mary_rebecca and @taniewanie on Twitter
4. Favorite Unicorn Parade on Etsy
5. Blog, facebook, or tweet about this giveaway (make sure to include @mary_rebecca and @taniewanie in your tweet) and include the link (one entry each)
Feel free to use this tweet:
I just entered a #GIVEAWAY for a spring inspired bunting by @taniewanie on @mary_rebecca 's blog! http://tiny.cc/191u5
6. Purchase an item from Tanie's shop and get (5) five additional entries! Leave transaction # as a separate comment.
I just entered a #GIVEAWAY for a spring inspired bunting by @taniewanie on @mary_rebecca 's blog! http://tiny.cc/191u5
6. Purchase an item from Tanie's shop and get (5) five additional entries! Leave transaction # as a separate comment.
This giveaway closes on Monday, April 11, 2011 at 11:00 PM EST.
International entries welcome.
COMMENTS ARE NOW CLOSED.

gfc skipthelaundry
ReplyDeleteI like my tulips.
skipthelaundry at gmail dot com
follow mary rebecca and taniewanie on twitter
ReplyDeleteskipthelaundry
skipthelaundry at gmail dot com
fav unicorn parade on etsy
ReplyDeleteskipthelaundry
skitphelaundry at gmail dot com
tweeted
ReplyDeletehttp://twitter.com/#!/skipthelaundry/status/55280897947205632
skipthelaundry at gmail dot com
I love flipflops!
ReplyDeletekaylynn_0419(at)yahoo(dot)com
I follow you both on twitter!
ReplyDeletekaylynn_0419(at)yahoo(dot)com
I favorite Unicorn Parade's Etsy shop
ReplyDeletekaylynn_0419(at)yahoo(dot)com
Follow via GFC as Monik.
ReplyDeleteI love flowery shoes for spring.
monikalintang@hotmail.com
Follow @mary_rebecca and @taniewanie on Twitter as @monikaretnani.
ReplyDeletemonikalintang@hotmail.com
Tweet about this giveaway here.
ReplyDeletemonikalintang@hotmail.com
My personal favorite spring accessory are my headbands. No outfit is complete without a hair piece!
ReplyDeleteI am following both of you on twitter with @girlygirlmoment.
ReplyDeleteI tweeted it!
ReplyDeletehttp://twitter.com/#!/girlygirlmoment/status/55844795909808128
I follow this blog via Google Friend Connect {Lesli}
ReplyDeleteMy fave accessory is adding lots of color!
littleumbrella (at) wow (dot) com
I follower of cupcake wishes & unicorn dreams via RSS
ReplyDeletelittleumbrella (at) wow (dot) com
I Follow @mary_rebecca and @taniewanie on Twitter
ReplyDeleteMy Twitter ID is @alittleumbrella
littleumbrella (at) wow (dot) com
I Favorite Unicorn Parade on Etsy
ReplyDeleteMy Etsy ID is: ultraviolet3
littleumbrella (at) wow (dot) com
I shared this on FB
ReplyDeletehttp://www.facebook.com/a.little.umbrella/posts/215798348433681
littleumbrella (at) wow (dot) com
Tweet
ReplyDeletehttp://twitter.com/#!/alittleumbrella/status/56901638396456962
littleumbrella (at) wow (dot) com
I am a follower of yours :)
ReplyDeleteMy favorite spring accessory has got to be wearing my sandals again :)
I just tweeted
ReplyDeletehttp://twitter.com/#!/ILoveMy2Dorks/status/57278718086889472