

Hello everyone! My name is Rhiannon and I run the blog Arts & Farts. My husband and I have gotten totally pumped on Halloween and have been making crafts since September! It seems like every week we’ve got a new project. Today I thought I'd share with you a tutorial for a garland I made.
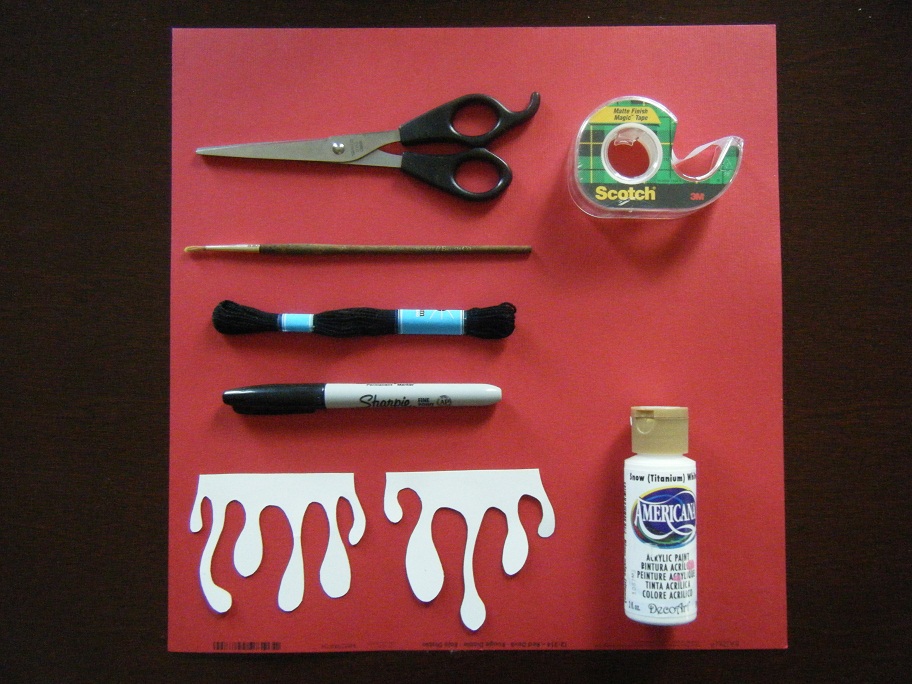
1. Gather your supplies. You will need:
A sheet (or a few sheets, depending how long you'd like your garland to be) of sturdy red paper
A nimble pair of scissors
A small paint brush
Embroidery floss
A writing utensil
White craft paint
Scotch tape
Your blood drippings templates
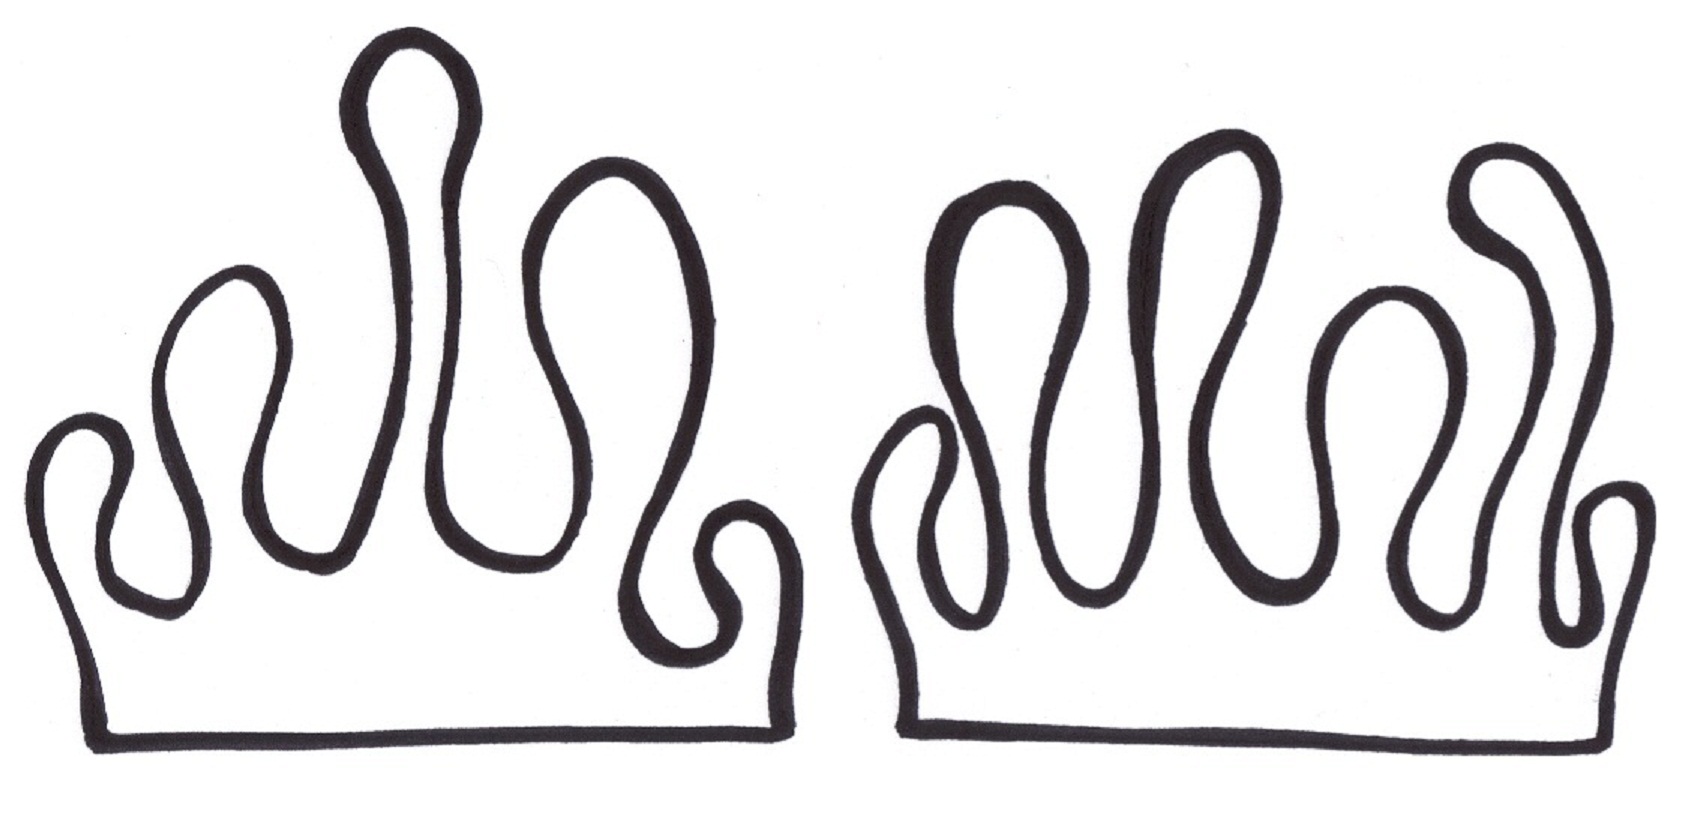
To make your templates, you'll need a thick paper. I recycled an old spiral notebook cover for mine, but even just a nice sheet of cardstock will do. You can draw out your own drippings, or print the ones I made (Link: http://i.imgur.com/oyabs.jpg).
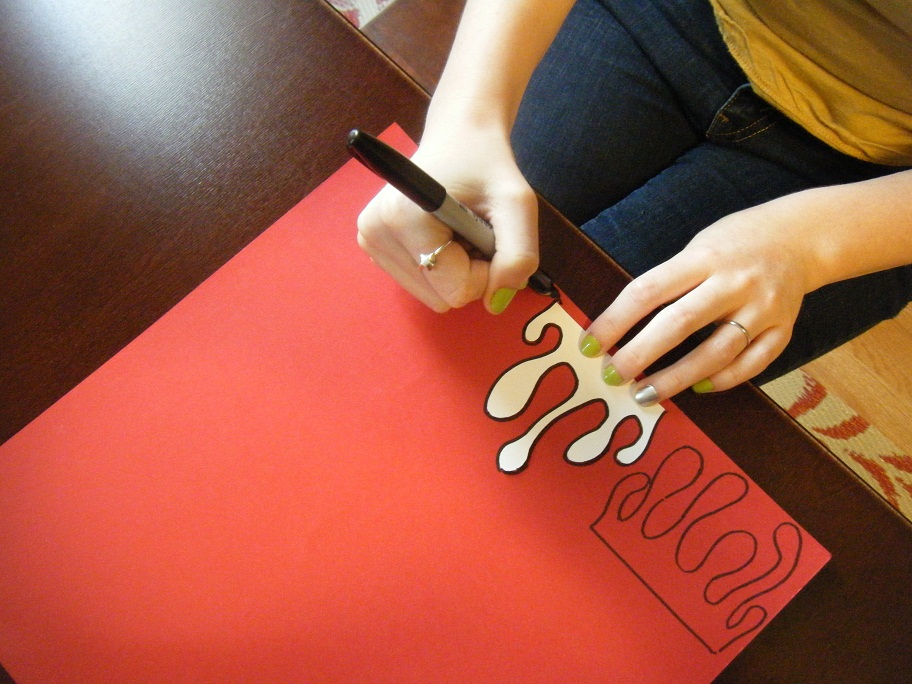
2. Trace the drippings on your red paper. Be sure to check for a texture on either side of the paper and do your tracing on the opposite side. The paper I picked up had some nice striations in it, but there are tons of really interesting kinds of paper at craft stores. I’d love to see this done on glittery paper.
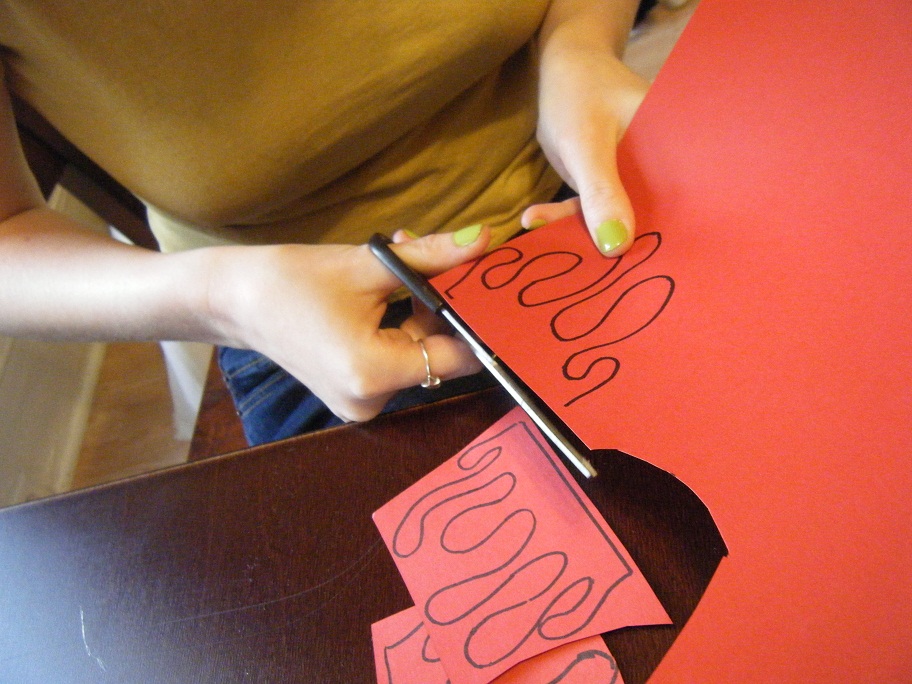 3. Once you've think you've got enough, cut them out. This is a fairly lengthy process, what with all the curves, so I cut them out in blocks and then parked in front of a movie to work on the details.
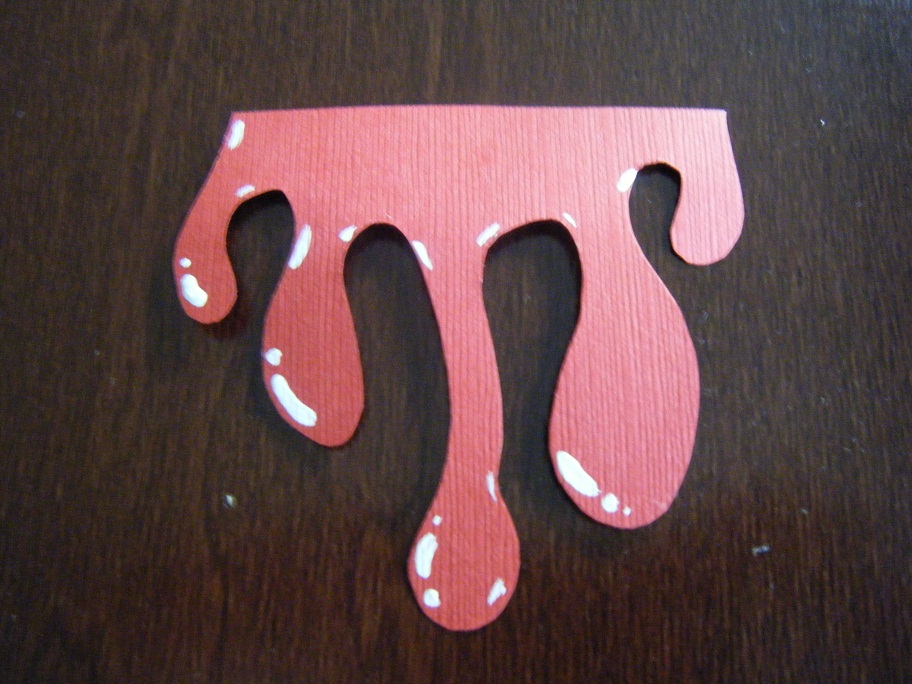 4. When you're all done cutting, grab your white paint and paint brush to add lighting accents. This gives the drippings a more realistic feel. When you're doing this, keep an imaginary light source in mind, such as directly to your right.
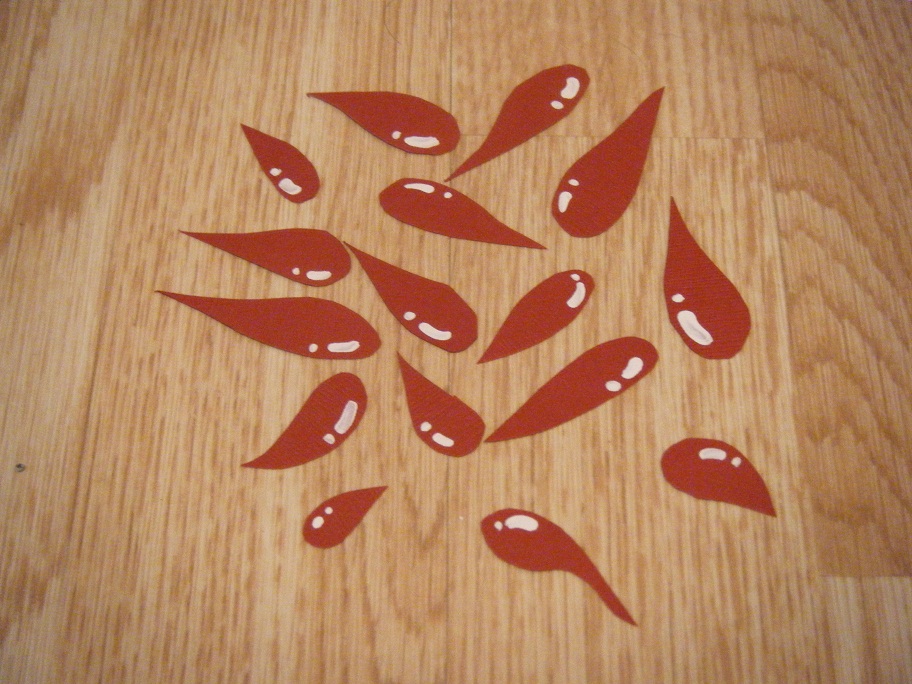 5. Make sure to save your scraps! There should be lots of nice droplets in your leftovers that will be easy to refine into single shapes. These will make a nice addition to your garland.
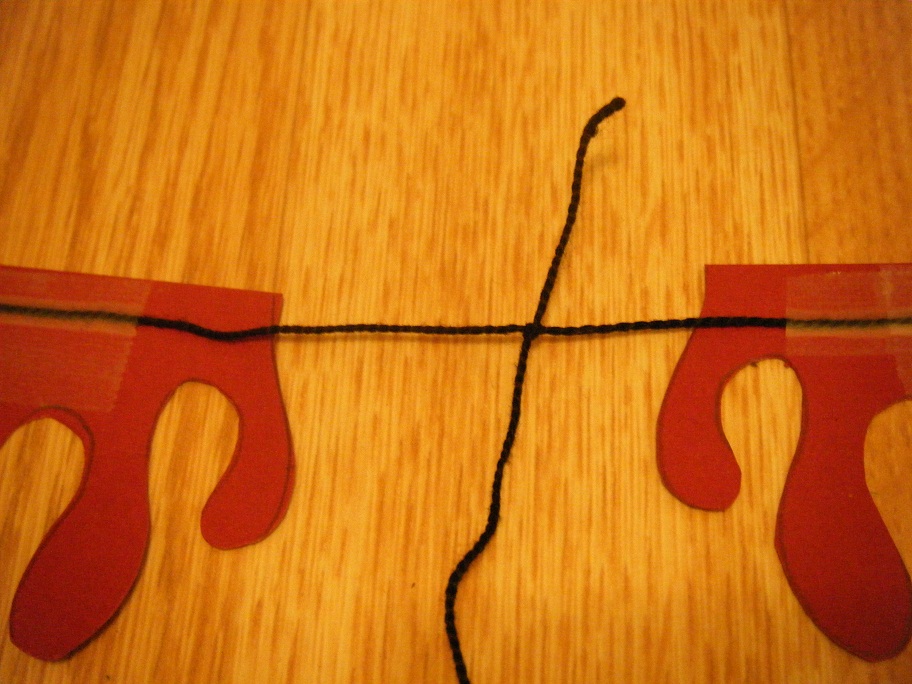
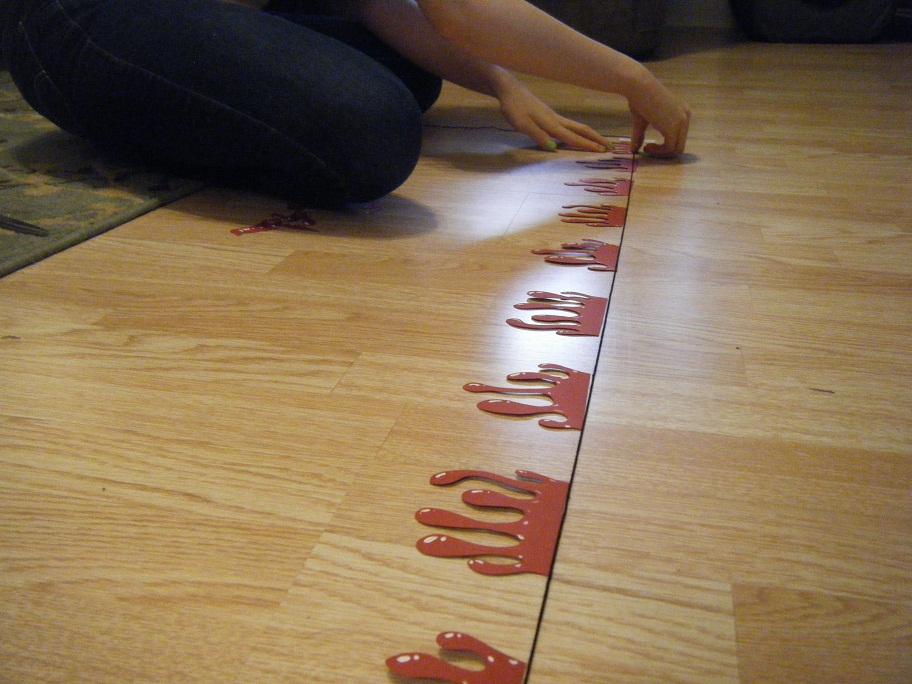 6. Next, line up all your drippings on a hard floor or long table. Space them out evenly to get a feel for how long your garland needs to be. Once everything is in order, stretch out your embroidery floss all the way across the top of your drippings and tape it down at each end, being sure to leave an extra 5 inches of string on both sides.
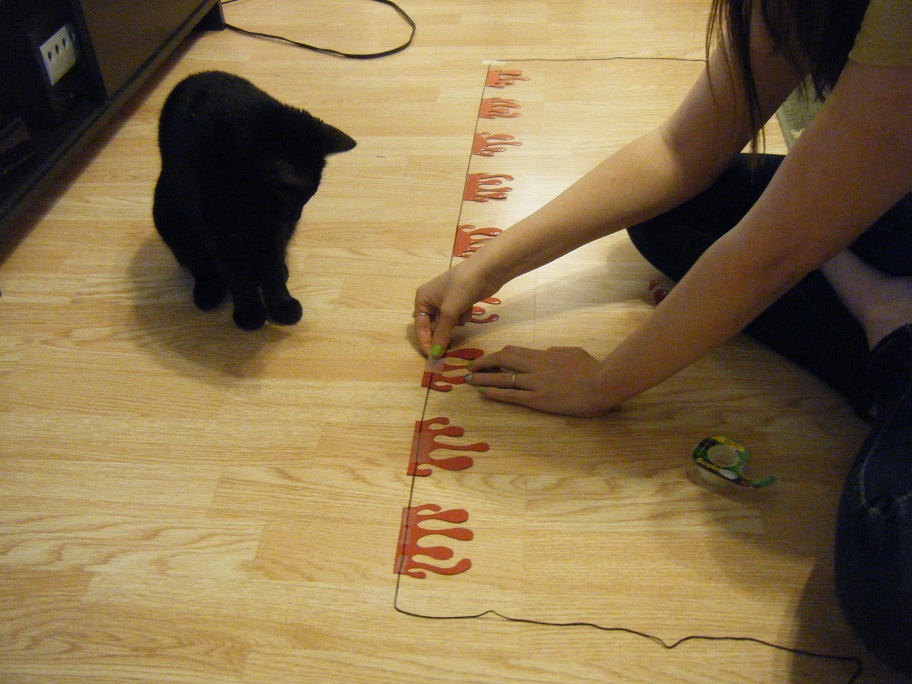 7. When everything looks orderly, flip each dripping piece over and tape it to the garland. This may require cutting and shaping your pieces of tape here and there. It also may require shooing away any pets who like string.
 8. After you've got all the big drippings taped onto the embroidery floss, tie on a few extra strings between the drippings. I found it was easiest to tie the string with a little tail, and then snip off the tail once I was sure the knot was secure. On the bottoms of these tails, as well as the tails you left when you first taped down your embroidery floss, tape on some of the single droplets.
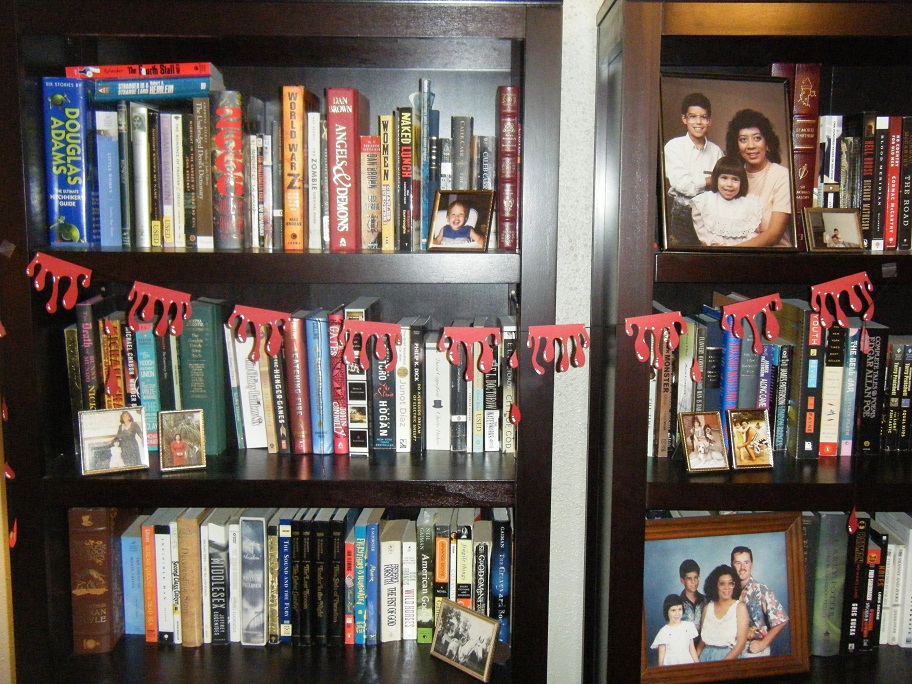 9. Once you've got all your droplets square away, you're all done! I hung my garland between two book shelves in my living room, but I think one would look great on the edge of a table at a Halloween party, or lining a wall just where it meets the ceiling in a spooky room!
Thanks so much for taking a look at my tutorial. If anyone decides to make one of these garlands, please take a photo and send it my way! I'd love to see what you've done with the project to make it your own.
--------------------------------------------------------------------------
Mary: Rhiannon--this creepy garland came out great! I love the added details of the white craft paint--really brings shape the blood. :D Thanks so much for sharing this DIY with all of us today
A sheet (or a few sheets, depending how long you'd like your garland to be) of sturdy red paper
A nimble pair of scissors
A small paint brush
Embroidery floss
A writing utensil
White craft paint
Scotch tape
Your blood drippings templates
To make your templates, you'll need a thick paper. I recycled an old spiral notebook cover for mine, but even just a nice sheet of cardstock will do. You can draw out your own drippings, or print the ones I made (Link: http://i.imgur.com/oyabs.jpg).
2. Trace the drippings on your red paper. Be sure to check for a texture on either side of the paper and do your tracing on the opposite side. The paper I picked up had some nice striations in it, but there are tons of really interesting kinds of paper at craft stores. I’d love to see this done on glittery paper.
Thanks so much for taking a look at my tutorial. If anyone decides to make one of these garlands, please take a photo and send it my way! I'd love to see what you've done with the project to make it your own.
--------------------------------------------------------------------------
Mary: Rhiannon--this creepy garland came out great! I love the added details of the white craft paint--really brings shape the blood. :D Thanks so much for sharing this DIY with all of us today

No comments:
Post a Comment